In this article we are going to give an overview of this application called PhpMyAdmin, which is one of the most popular applications for the management of MySQL databases. Throughout my professional career I have used this tool to manage the databases of website developments I’ve worked with, since this application is one that many web hosting providers give their clients to manage their databases used on their websites.
PhpMyAdmin is a free tool written in PHP that provides us with an interface to work with MySQL databases. Through this application we can create, modify, and delete records, as well as import and export tables from the MySQL database. We can also run MySQL queries, optimize and repair the database, and many more tasks.
In this article we will learn how to use PhpMyAdmin and how to manage our MySQL databases with it.
PhpMyAdmin Features
- Intuitive web interface
- Support for most MySQL features:
- Browse and drop databases, tables, views, fields and indexes
- Create, copy, drop, rename and alter databases, tables, fields and indexes
- Maintenance server, databases and tables, with suggestions for server configuration
- Execute, edit and bookmark any SQL-statement, even batch-queries
- Manage MySQL user accounts and privileges
- Manage stored procedures and triggers
- Import data from CSV and SQL
- Export data to various formats: CSV, SQL, XML, PDF, ISO/IEC 26300 – OpenDocument Text and Spreadsheet, Word, LATEX and others
- Administering multiple servers
- Creating graphics of your database layout in various formats
- Creating complex queries using Query-by-example (QBE)
- Searching globally in a database or a subset of it
- Transforming stored data into any format using a set of predefined functions, like displaying BLOB-data as image or download-link
- And much more…
PhpMyAdmin Installation
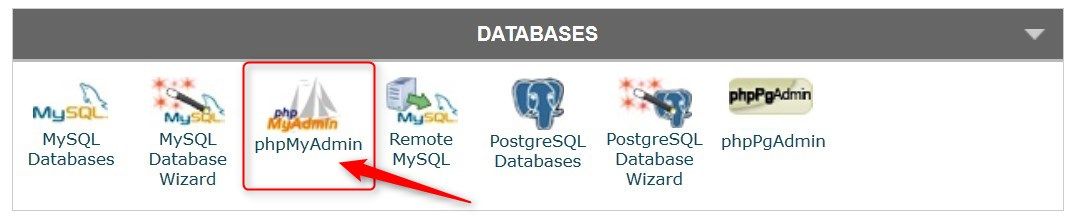
If we have a website with dynamic content on the Internet, for example, if we use a site developed in WordPress, we will have access to this application from our cPanel.
First, put the URL in the browser with our domain and /cpanel at the end, as in the following link, and then enter your credentials. http://www.mydomain.com/cpanel
In the section "Databases" we will find the phpMyAdmin icon, which allows us to enter the application:
If we don't have access to a web hosting server and want to learn how to use this application to manage the MySQL database locally, we can install PhpMyAdmin on our PC using third-party products, for example, XAMPP, which is the most popular PHP development environment for Windows, Linux and OS X, a completely free, Apache distribution containing MariaDB, PHP, and Perl. The XAMPP open source package has been set up to be easy to install and to use. We also have other means of installation, which we can see in the PhpMyAdmin documentation.
Another third-party tool used to install PhpMyAdmin is the WampServer, which is a Windows-only web development environment that allows us to create web applications with Apache2, PHP and a MySQL database and also installs PhpMyAdmin to manage the MySQL database. In my example I have installed this tool to access PhpMyAdmin.
PhpMyAdmin Home Page
We enter our PhpMyAdmin using any of the options described above.
In our example, we’re using third party tools on our local PC, so in the login screen, we will put the credentials as user: root, and leave the password: blank. This is in a local environment and only for practice purposes. We can’t leave the root user blank in any other situation.
The Home screen is displayed:
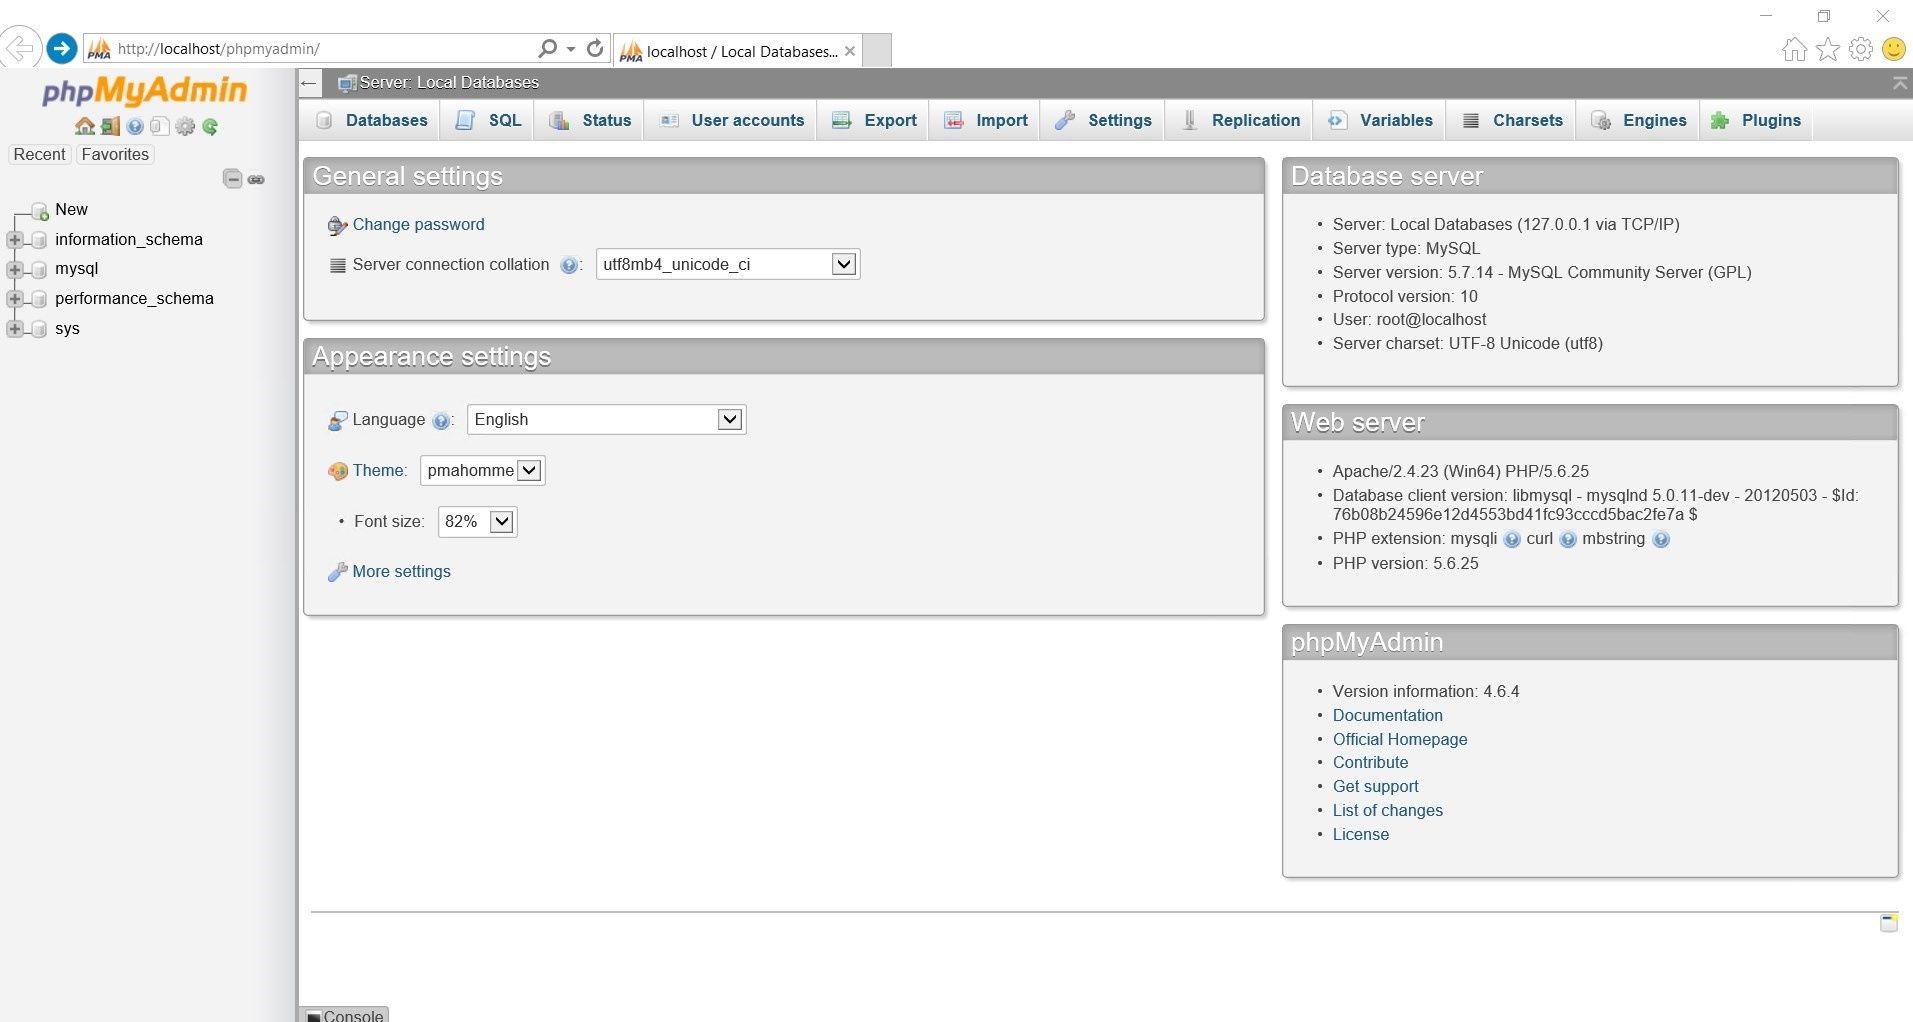
At the top of the page is the hostname of the server, in this case Server: Local Databases. Generally, on the web hosting servers it’s called localhost. All the databases we create will be stored on the same server.
In addition, we can see different sections on the page:
- General settings: In this section we can change the password and select the type of collation of the MySQL database connection, which are related to the interaction of a client with the server.
- Appearance settings: In this section we can change the default language, modify the style, change font size, and customize the theme color and other settings of the application’s appearance.
- Database server: This section displays information about the MySQL server.
- WebServer: This section displays information about the web server.
- PhpMyAdmin: This section displays information about the PhpMyAdmin version.
Create a new MySQL database
Because we are working on the application on our hosting server we will not be able to create a database directly from PhpMyAdmin. This operation can be performed only by assistants in the cPanel of our server.
When are working in local, we can easily create a database as follows:
From the start page of the application, we click on the first tab, "Databases"
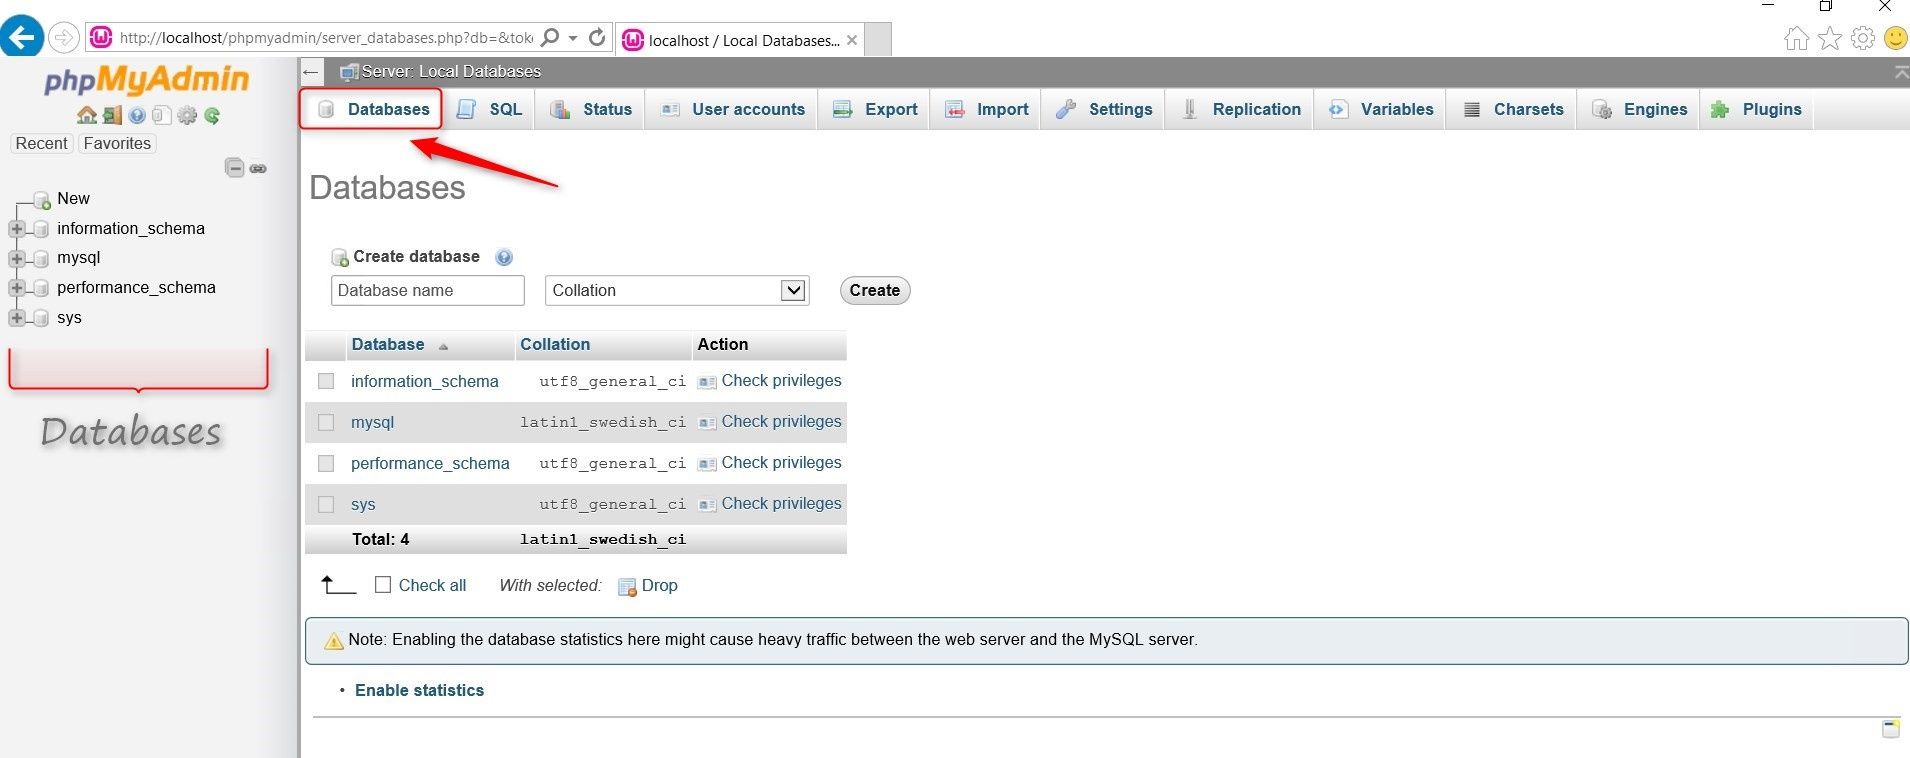
In the first field we place the name of the database and then select the type of collation we want. The collation is like the rules or operations that are used to work with the characters in the database, for example, to differentiate of capitals or lowercase or to recognize the tildes, or conflicting characters like the “ñÑ” or other special symbols. Therefore, it's important to define the correct collation in case we use the database to store information in any other language; otherwise, we will have problems executing the SQL queries.
Database Name: MyDemoCMO

Collation: utf8_general_ci
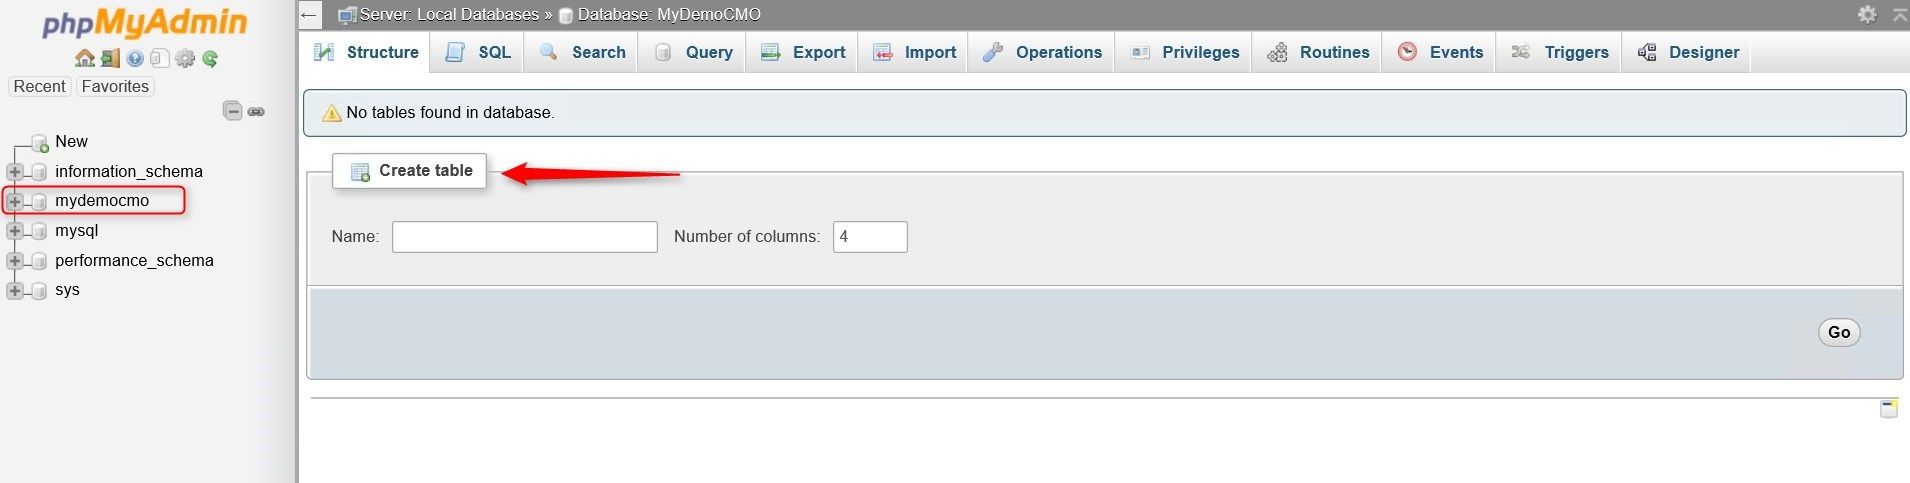
Once the database is created, the option to create a table appears.
Create a new table in the database
We select the newly created database from the left panel where all the databases are available.
The first tab, "Structure", which shows table structure, will be selected. In our example, we don't have any tables, so we will create our first table:
Name: MyContacts

Number of Columns: 5
Click the Go button.
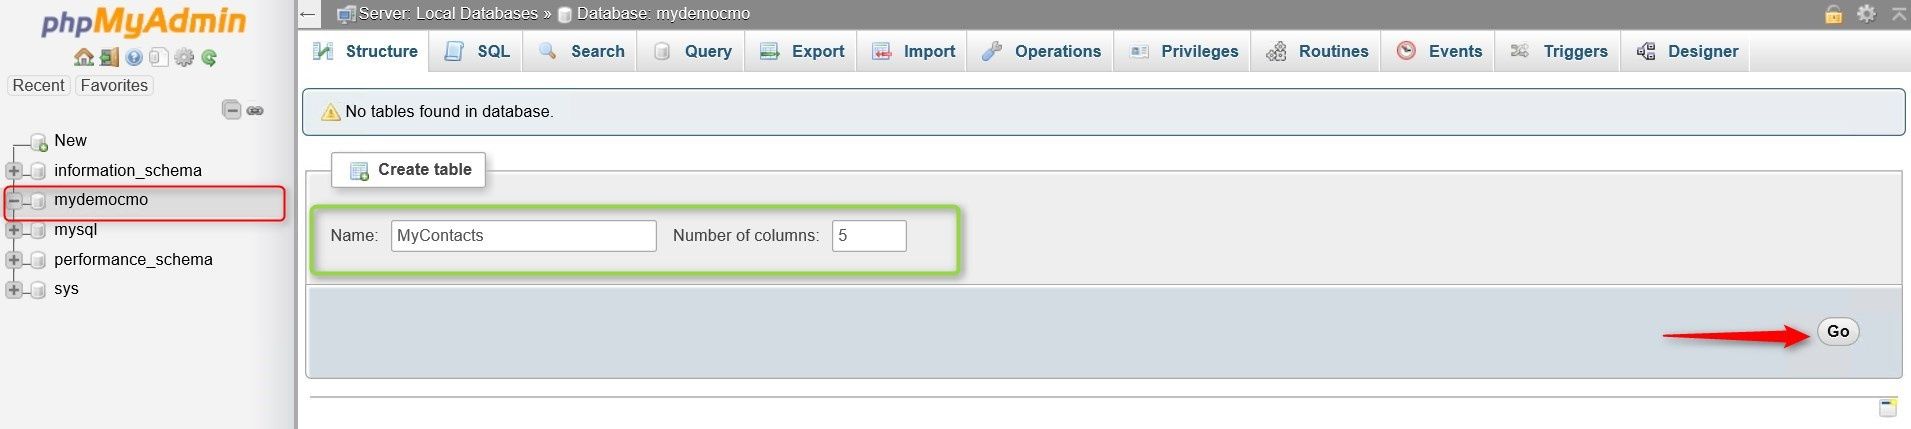
The screen for entering the name of the columns and the type of data to be used in each column is displayed.
|
Name of Columns |
Type |
Length/Values |
|
ID (PK) |
INT |
8 |
|
FIRSTNAME |
VARCHAR |
30 |
|
LASTNAME |
VARCHAR |
30 |
|
|
VARCHAR |
50 |
|
PHONE |
VARCHAR |
14 |
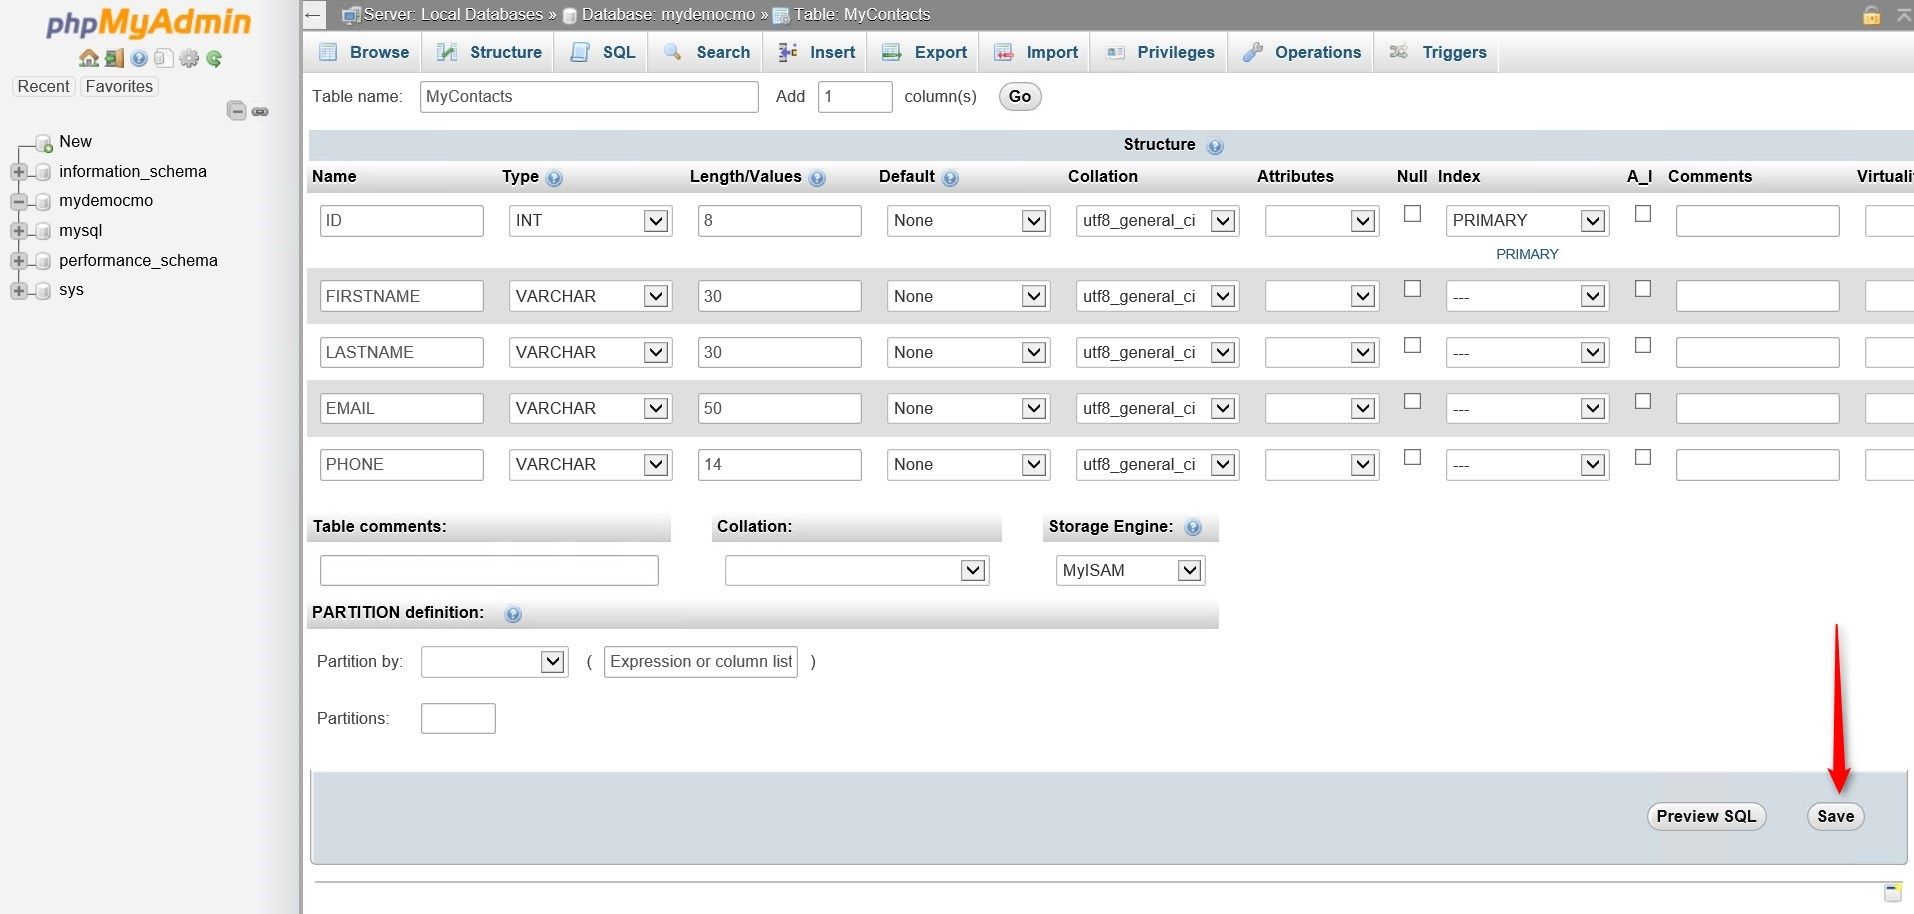
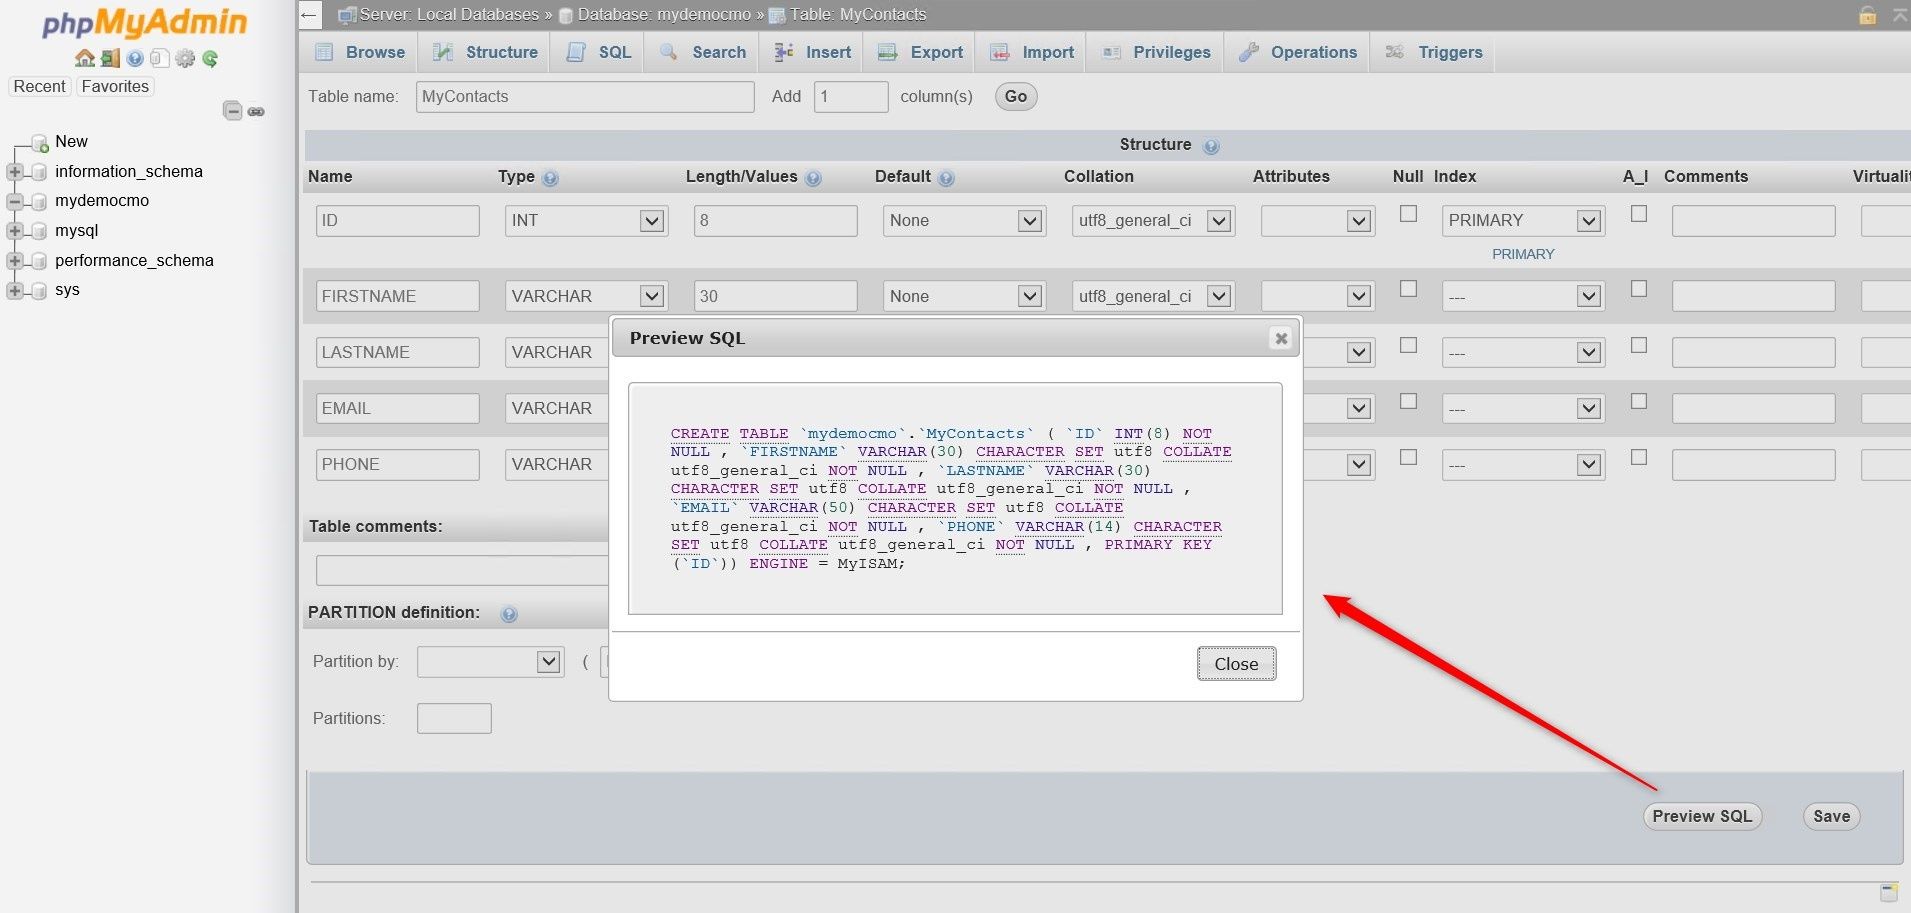
Once we enter the column data, we can preview the SQL query that will be executed by clicking on the Preview SQL button.
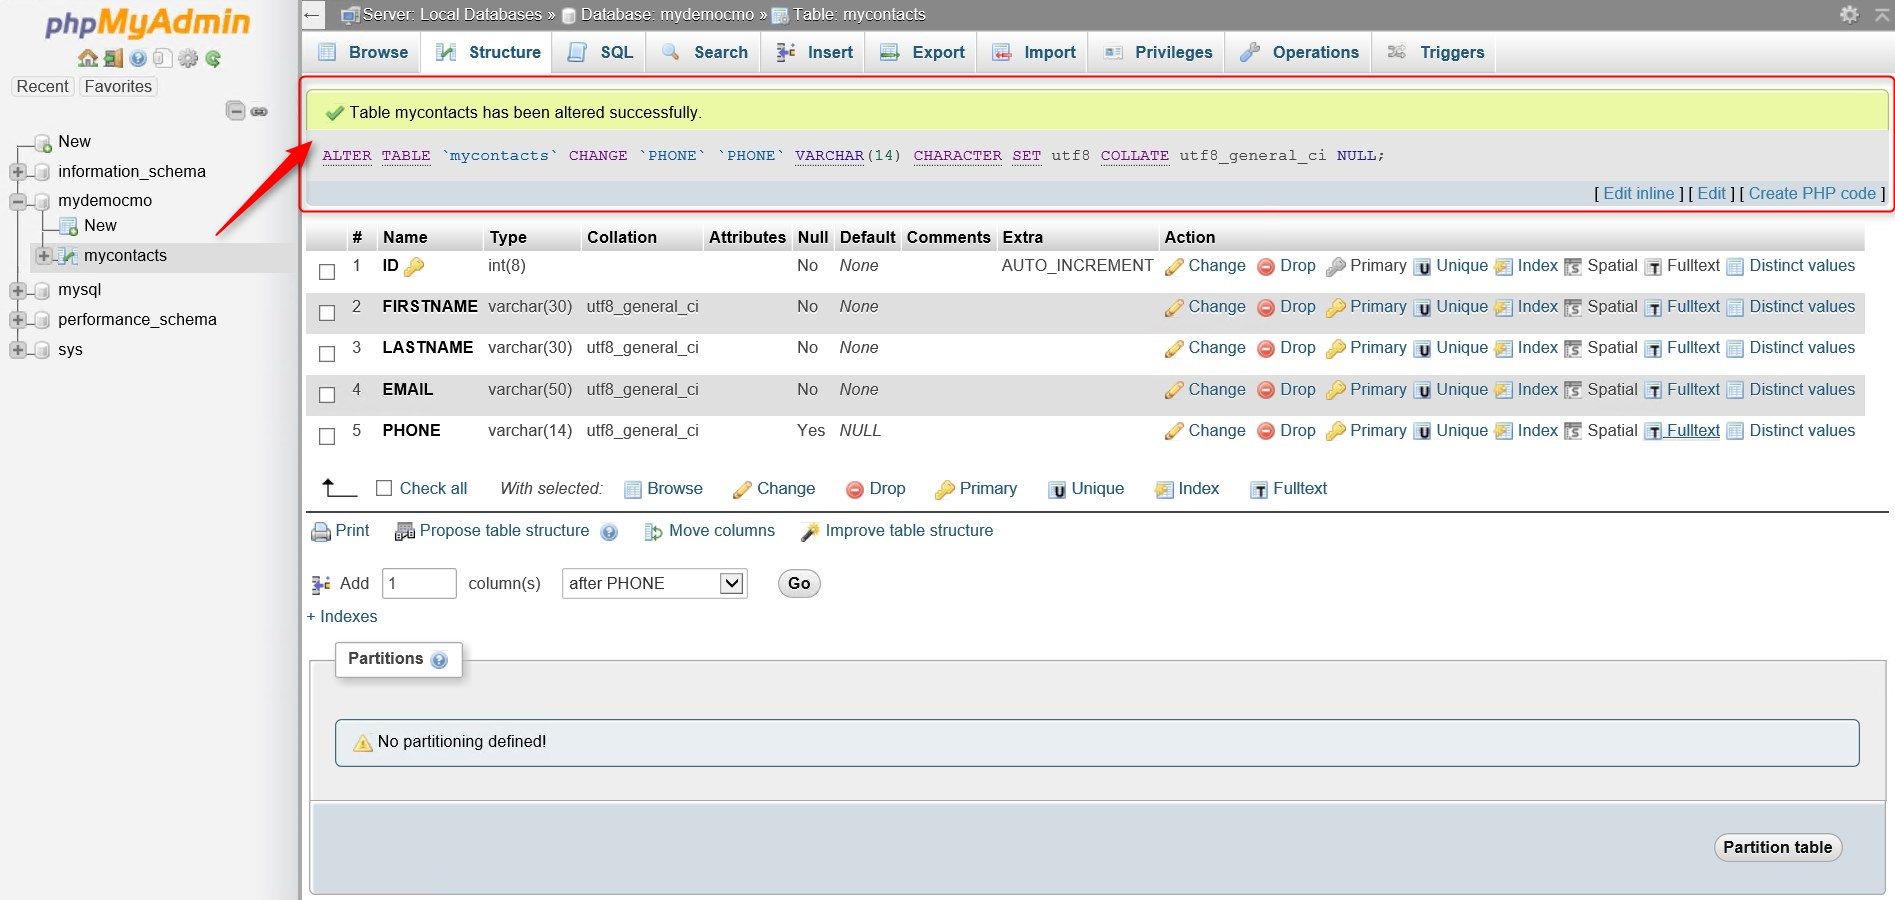
The structure of the newly created table is shown below.
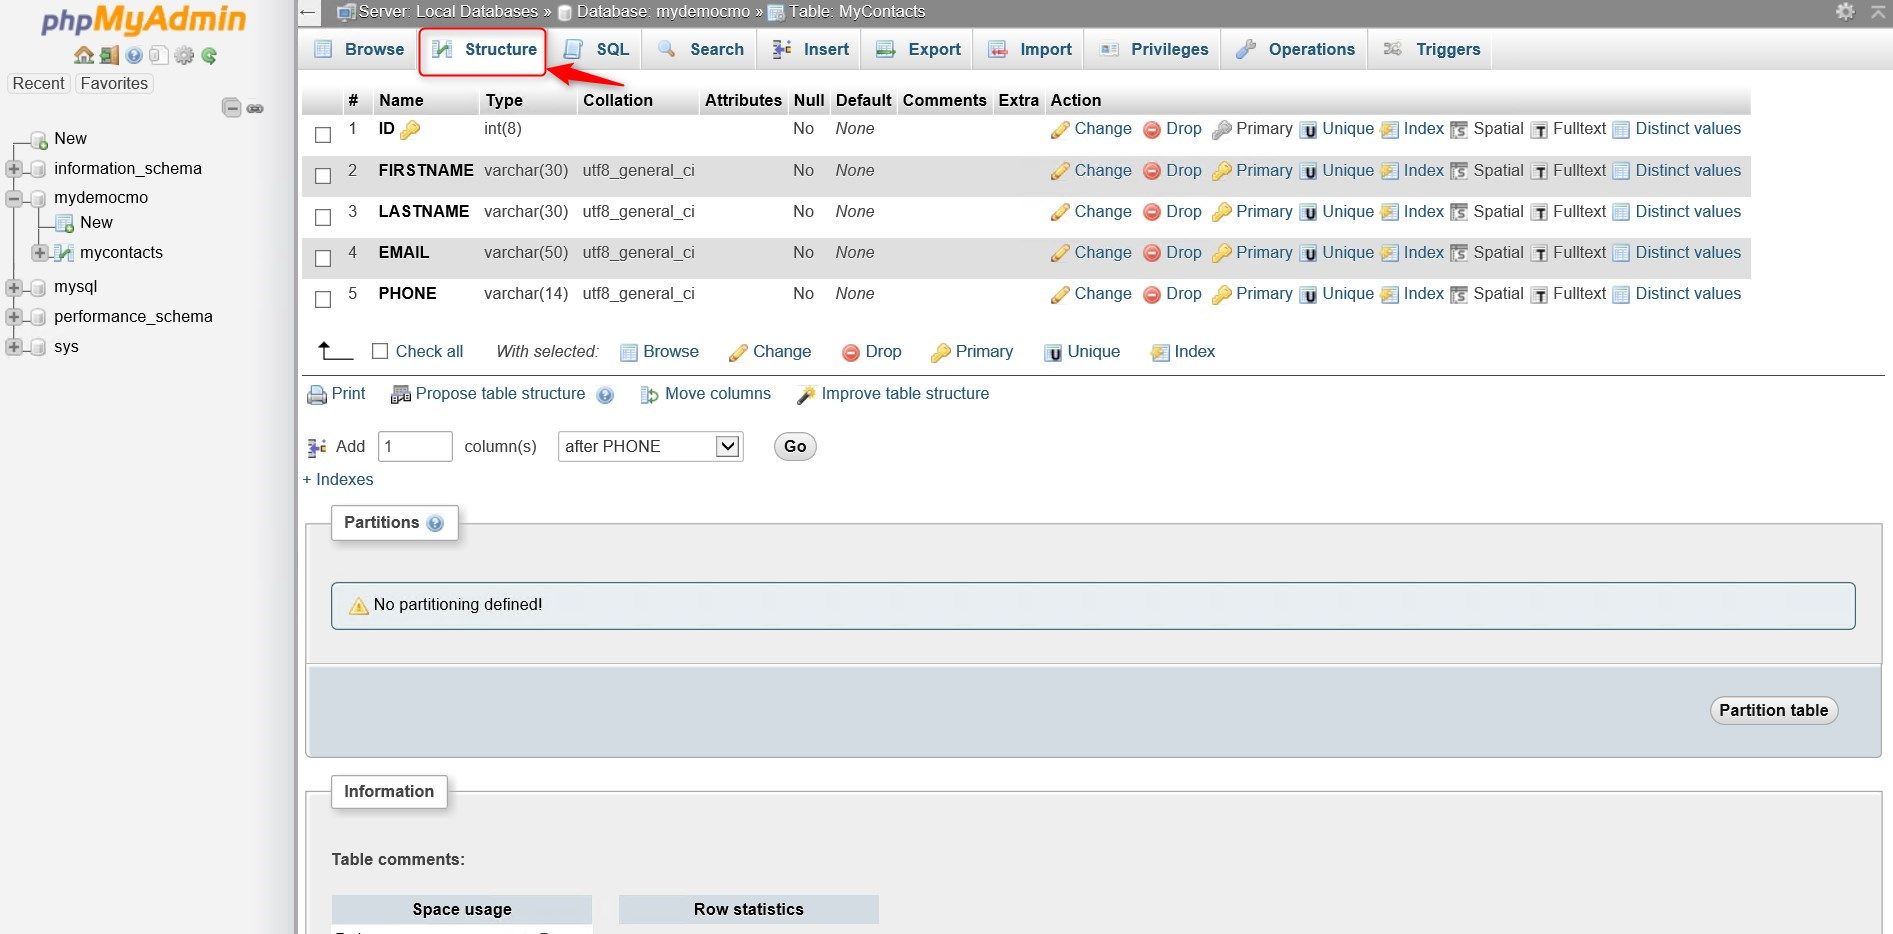
Edit Columns in the MyContacts Table
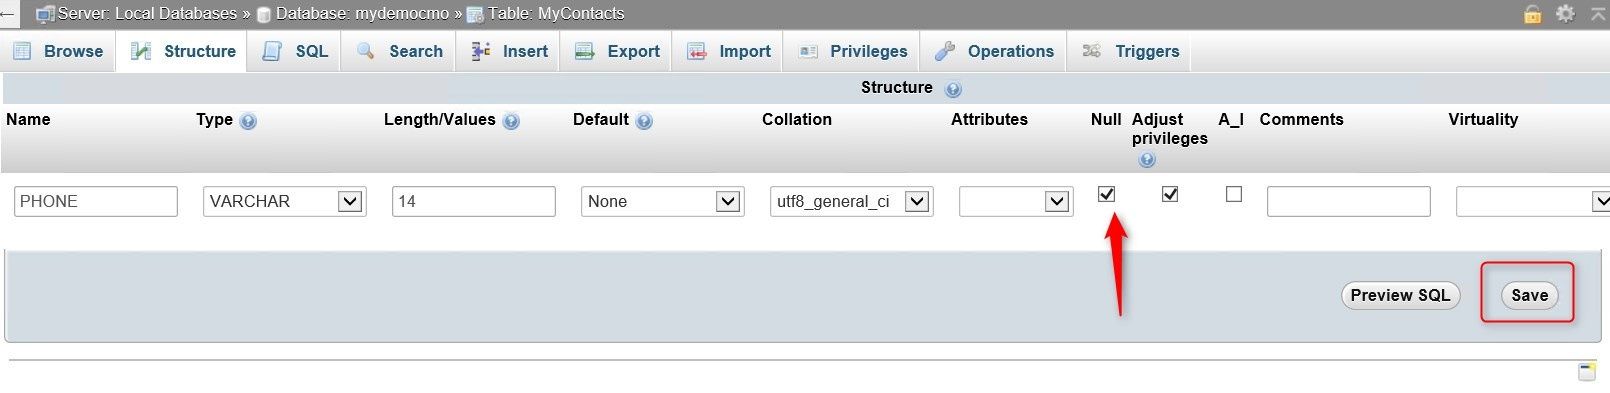
To edit the attributes of a table column, we have to click on the Change link; for example, we will indicate that the column of the primary key ID is auto-incremental. To do this we edit the column and check in the box A_I and then click on the Save button.
Then we edit the PHONE column and check in the Null box so that the column can accept null, and finally, click the Save button.
Every time we perform an operation with this tool, we can see the SQL query successfully executed at the top of the page. If we have an error, it is displayed at the bottom of the page.
Insert, edit, and delete records in the MyContacts table
To continue working with the tool we need to load some records in the newly created table. To do this, we will use the "Insert" tab.
As we can see, there is a screen that allows us to easily enter the records into the table. In the first column of the ID, we do not enter anything because it's an auto-incremental column.
ID: Blank
Firstname: Melanie
Lastname: Smith
Email: melanie@miemail.com
Phone: 123-123-1234
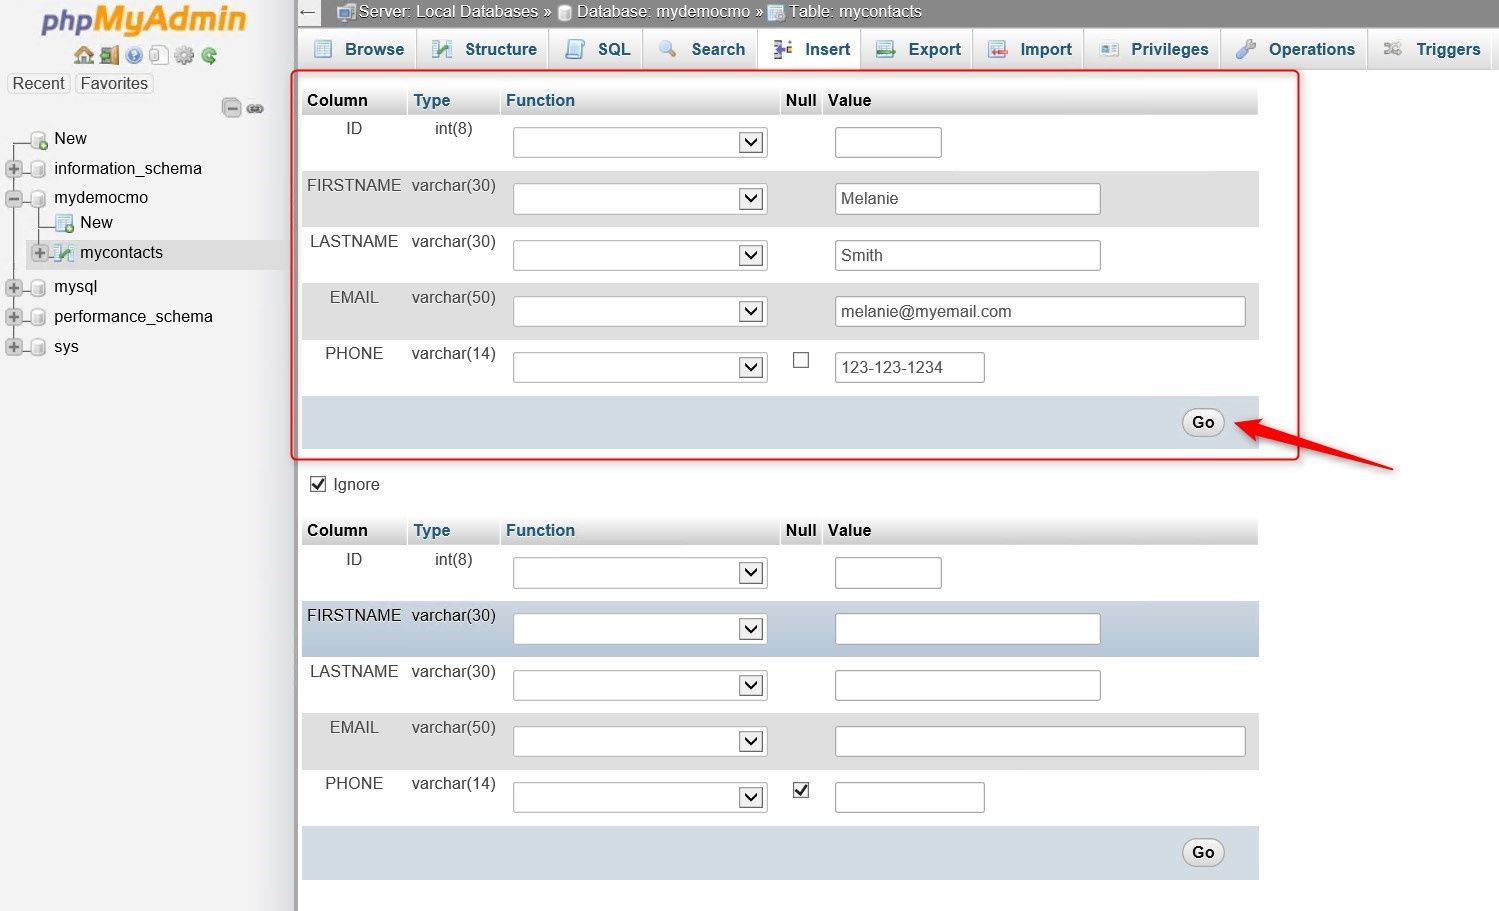
Click the Go button.
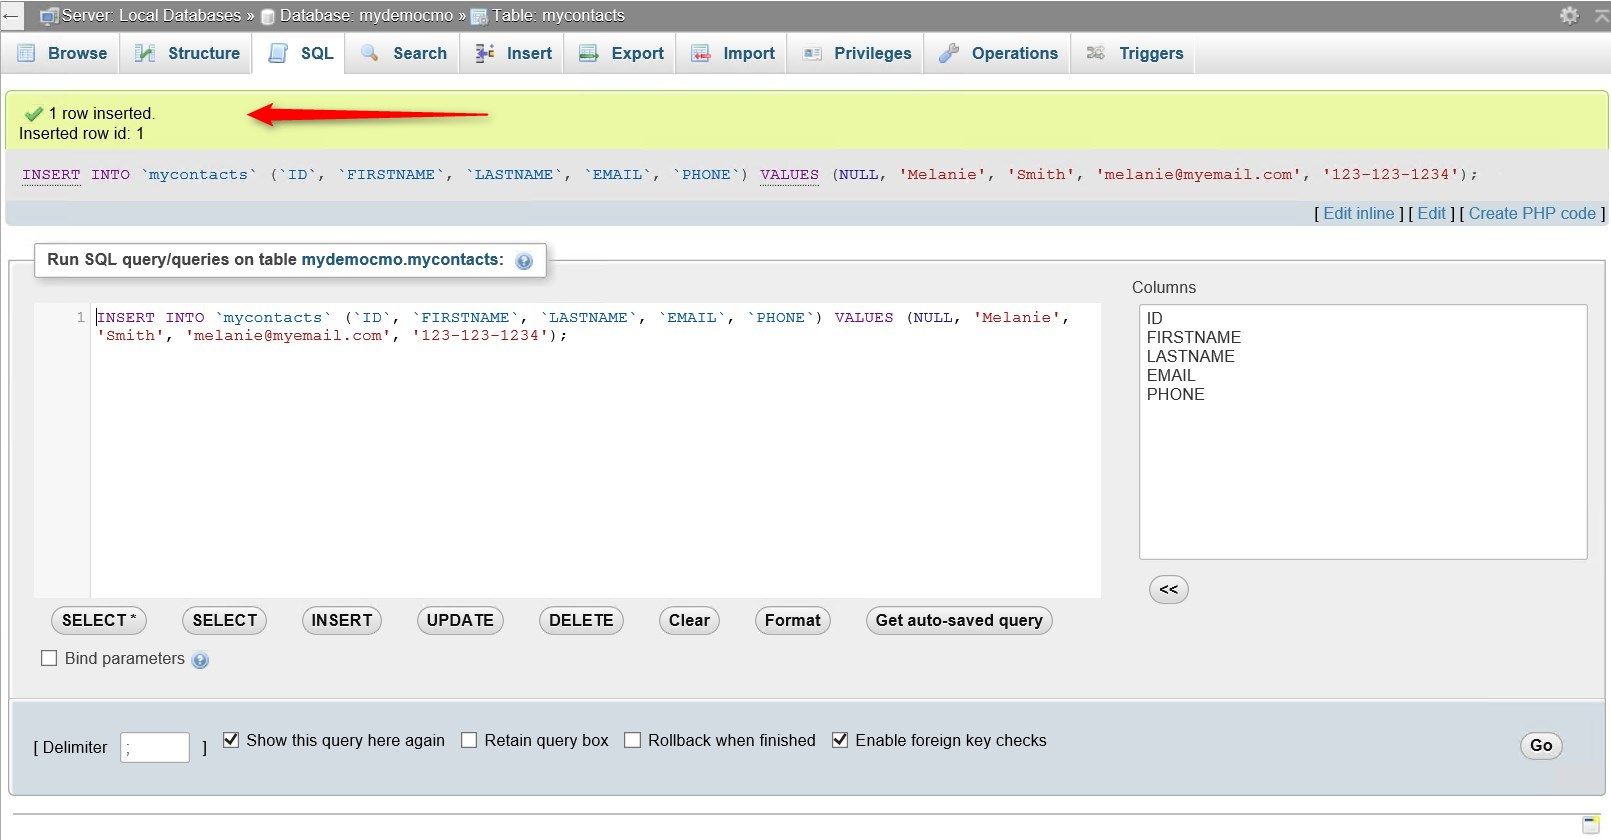
The generated insert query is displayed at the top of the page.
This way, we can enter in several records in our demo table.
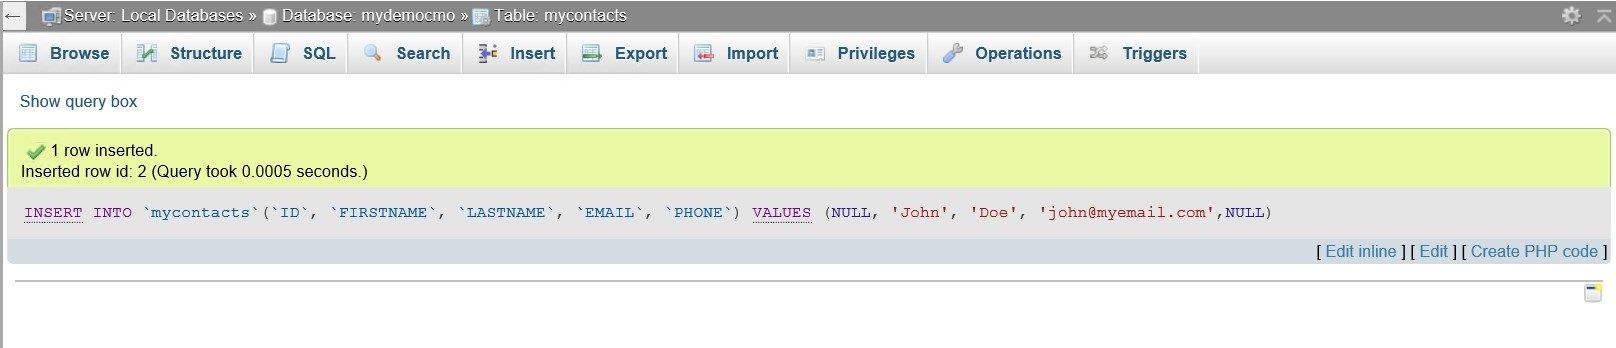
If we want to execute the SQL query directly we can do it by accessing the "SQL" tab.
The console for entering the SQL statement will appear; we can click the INSERT button to generate the syntax of the query automatically and then replace the values with the correct data:
INSERT INTO `mycontacts` (`ID`, `FIRSTNAME`, `LASTNAME`, `EMAIL`, `PHONE`) VALUES (NULL, 'John', 'Doe', 'john@myemail.com', NULL);
We can enter the following statements to populate the sample table:
INSERT INTO `mycontacts` (`ID`, `FIRSTNAME`, `LASTNAME`, `EMAIL`, `PHONE`)
VALUES (NULL, 'Clarisa', 'Maman Orfali', 'clarisa@myemail.com', NULL);

INSERT INTO `mycontacts` (`ID`, `FIRSTNAME`, `LASTNAME`, `EMAIL`, `PHONE`)
VALUES (NULL, 'Fernando', 'García', 'fernando@myemail.com', NULL);

INSERT INTO `mycontacts` (`ID`, `FIRSTNAME`, `LASTNAME`, `EMAIL`, `PHONE`)
VALUES (NULL, 'Nicolas', 'Williams', 'nicolas@myemail.com', NULL);

INSERT INTO `mycontacts` (`ID`, `FIRSTNAME`, `LASTNAME`, `EMAIL`, `PHONE`)
VALUES (NULL, 'Robert', 'Jones', 'jones@myemail.com', NULL);
To display the loaded records of the table, click on the tab "Browse" tab.
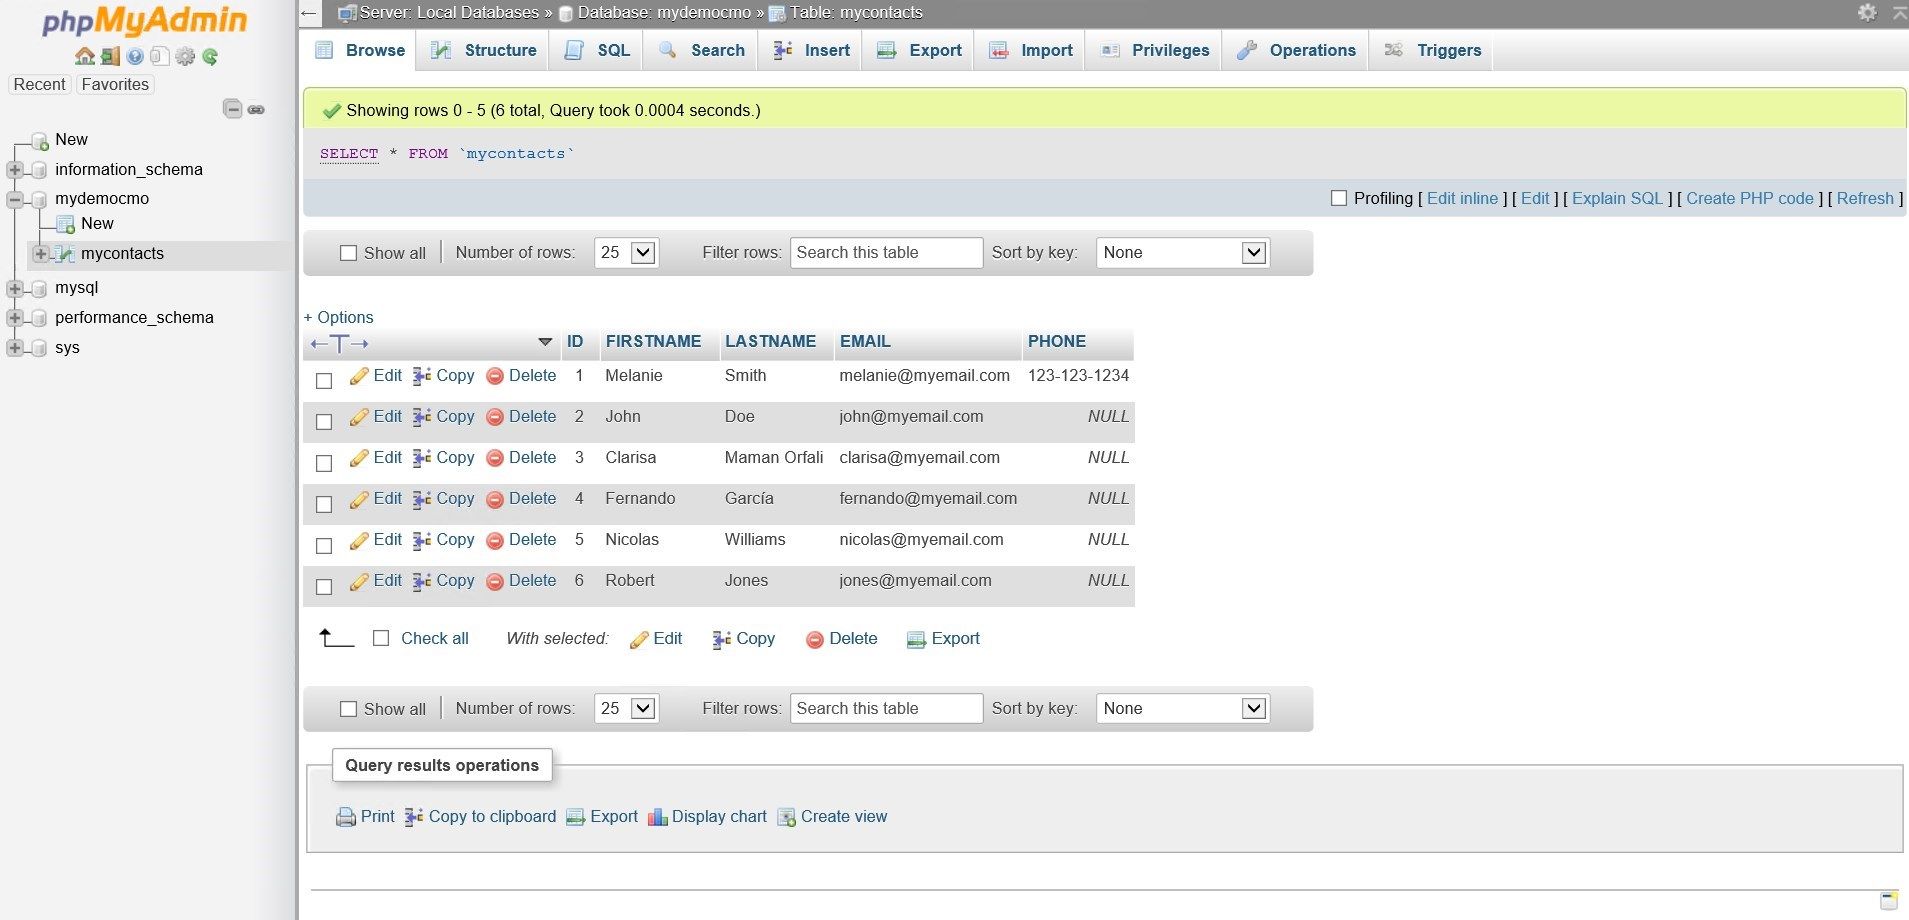
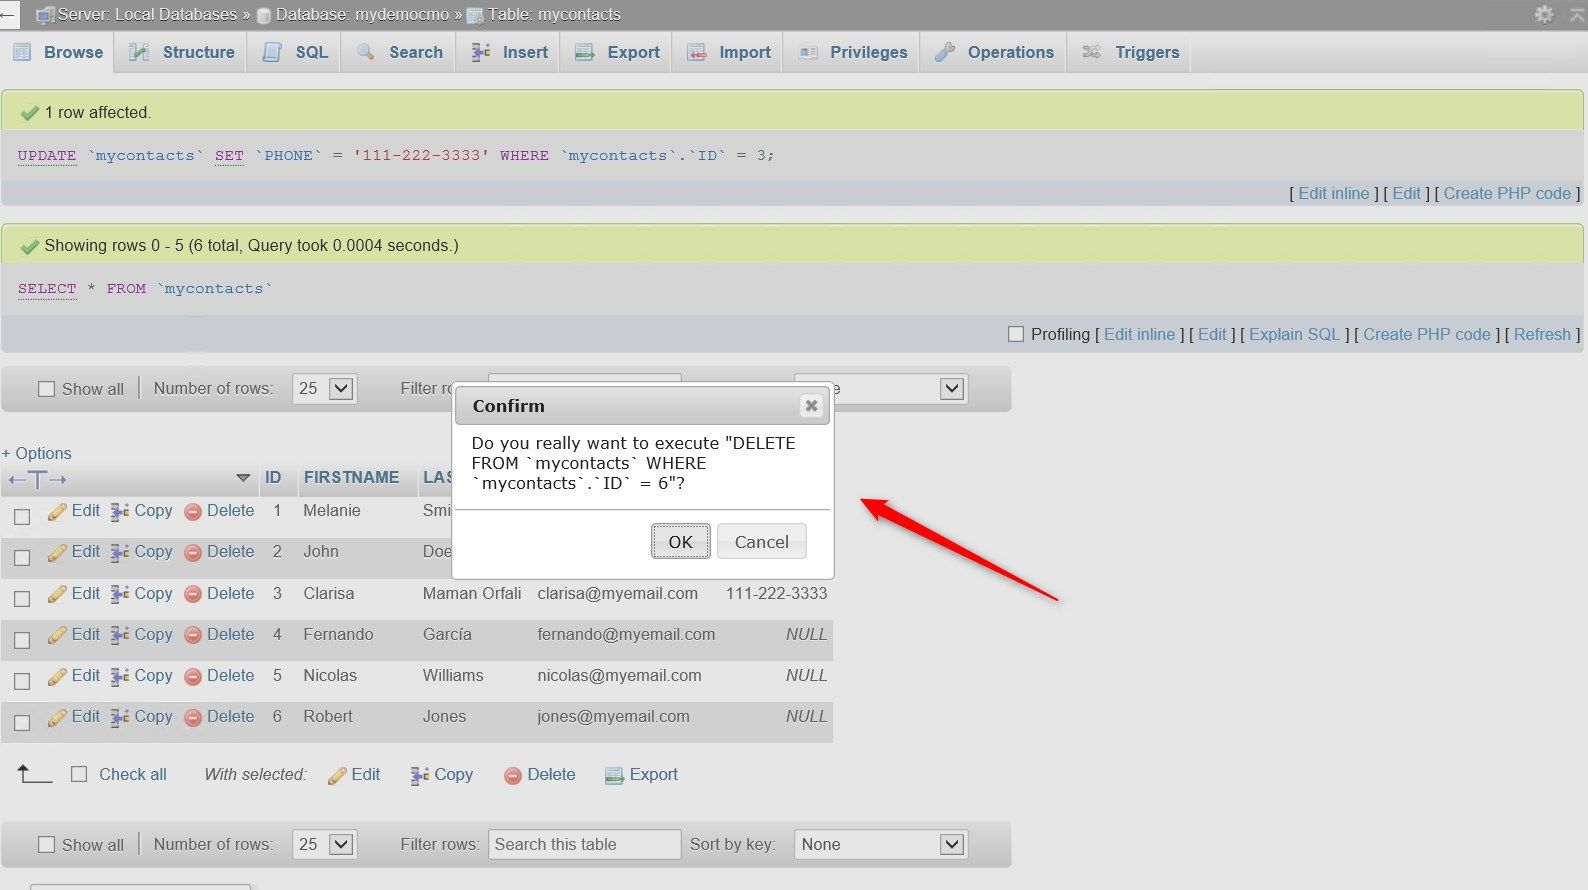
We can edit a record by clicking on the Edit link . The record opens for editing; for example, we can enter the phone for one of the records and save it.
To delete a record we can simply click the Delete link. A modal window will be displayed with the SQL statement that will be generated if we click the OK button.
As we can appreciate, this MySQL database management tool is very intuitive and easy to use.
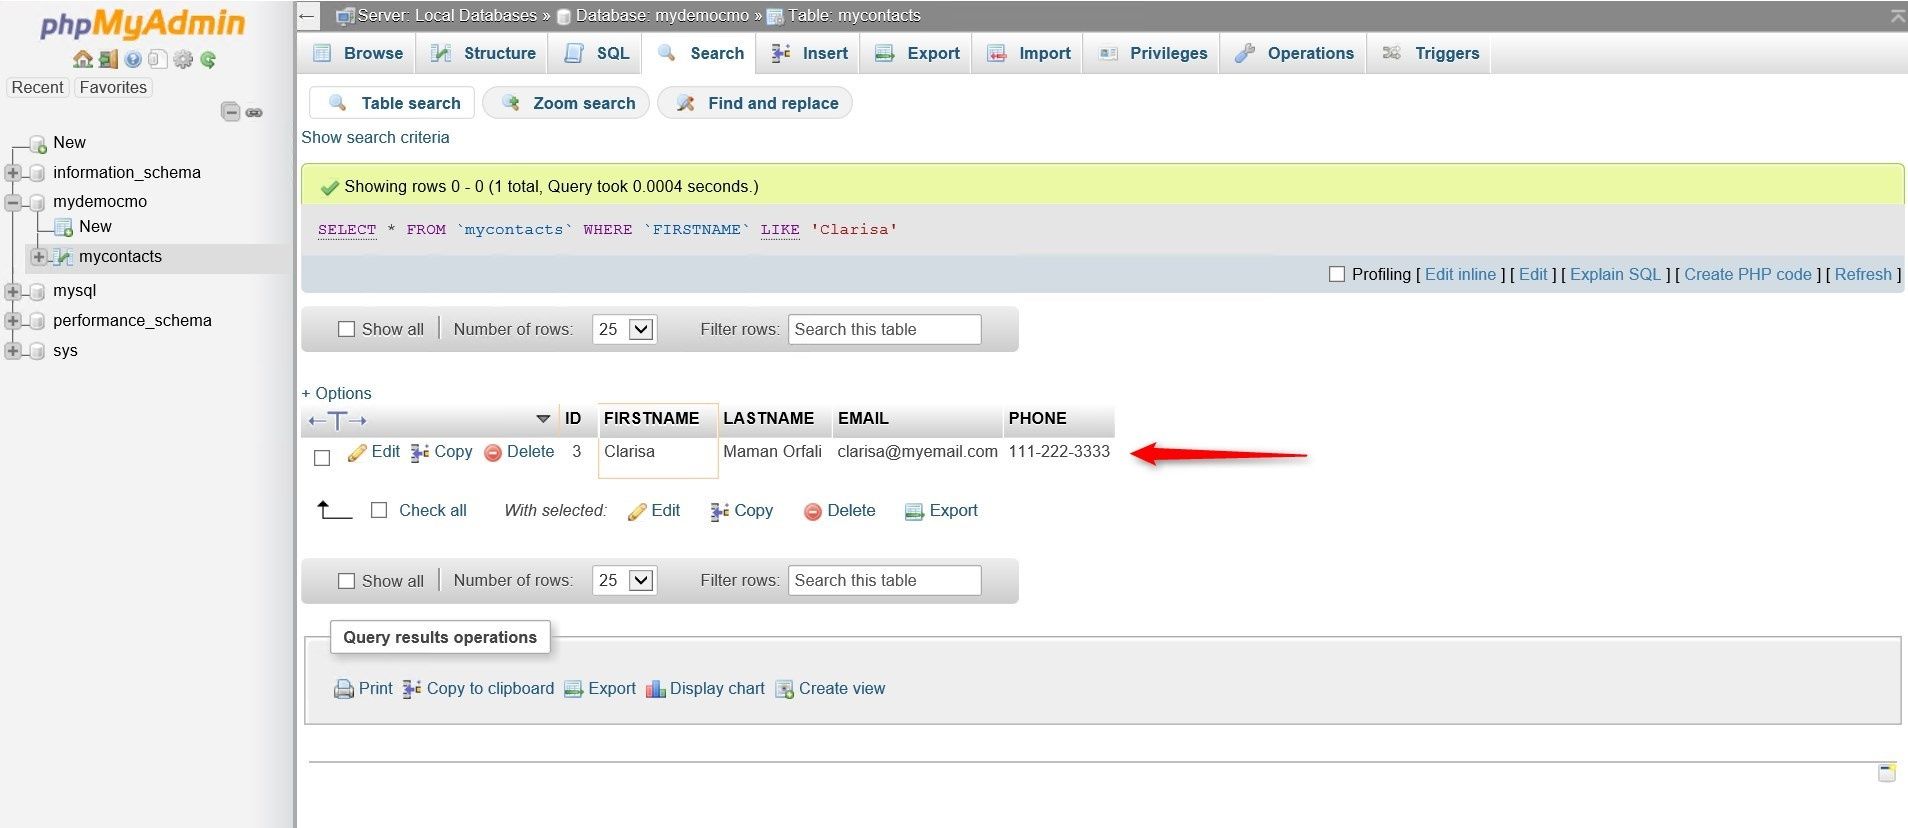
Search Operation
To search for data in a table, we have the "Search" option. We can use different search criteria, such as: [LIKE, LIKE %…%, NOT LIKE, IN, NOT IN, BETWEEN, NOT BETWEEN, IS NULL, IS NOT NULL, REGEXP, =, ETC] and wildcards "%".
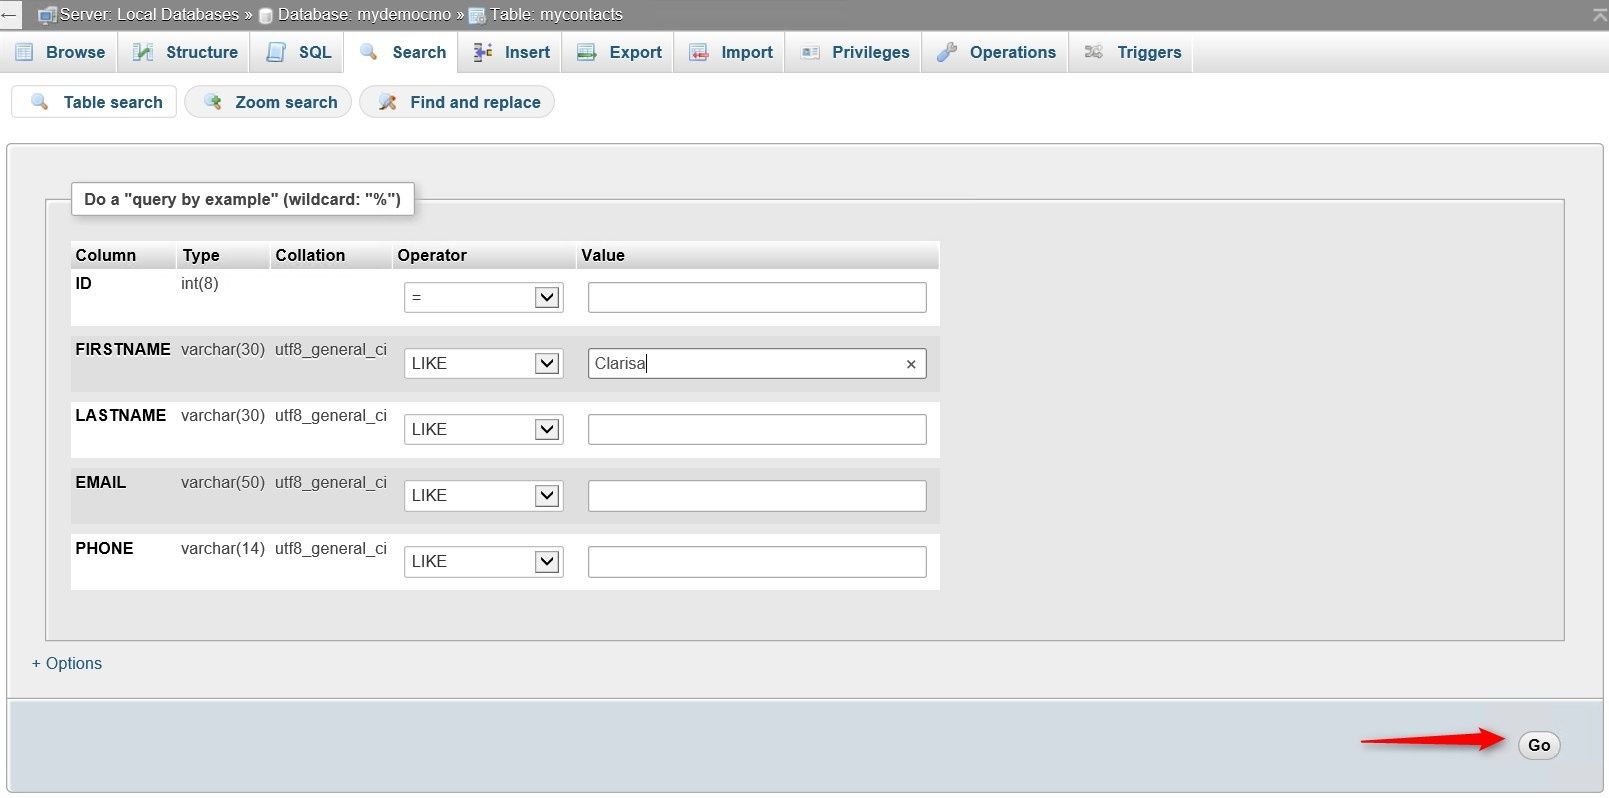
If we click on the Go button, we can see the result of the search:
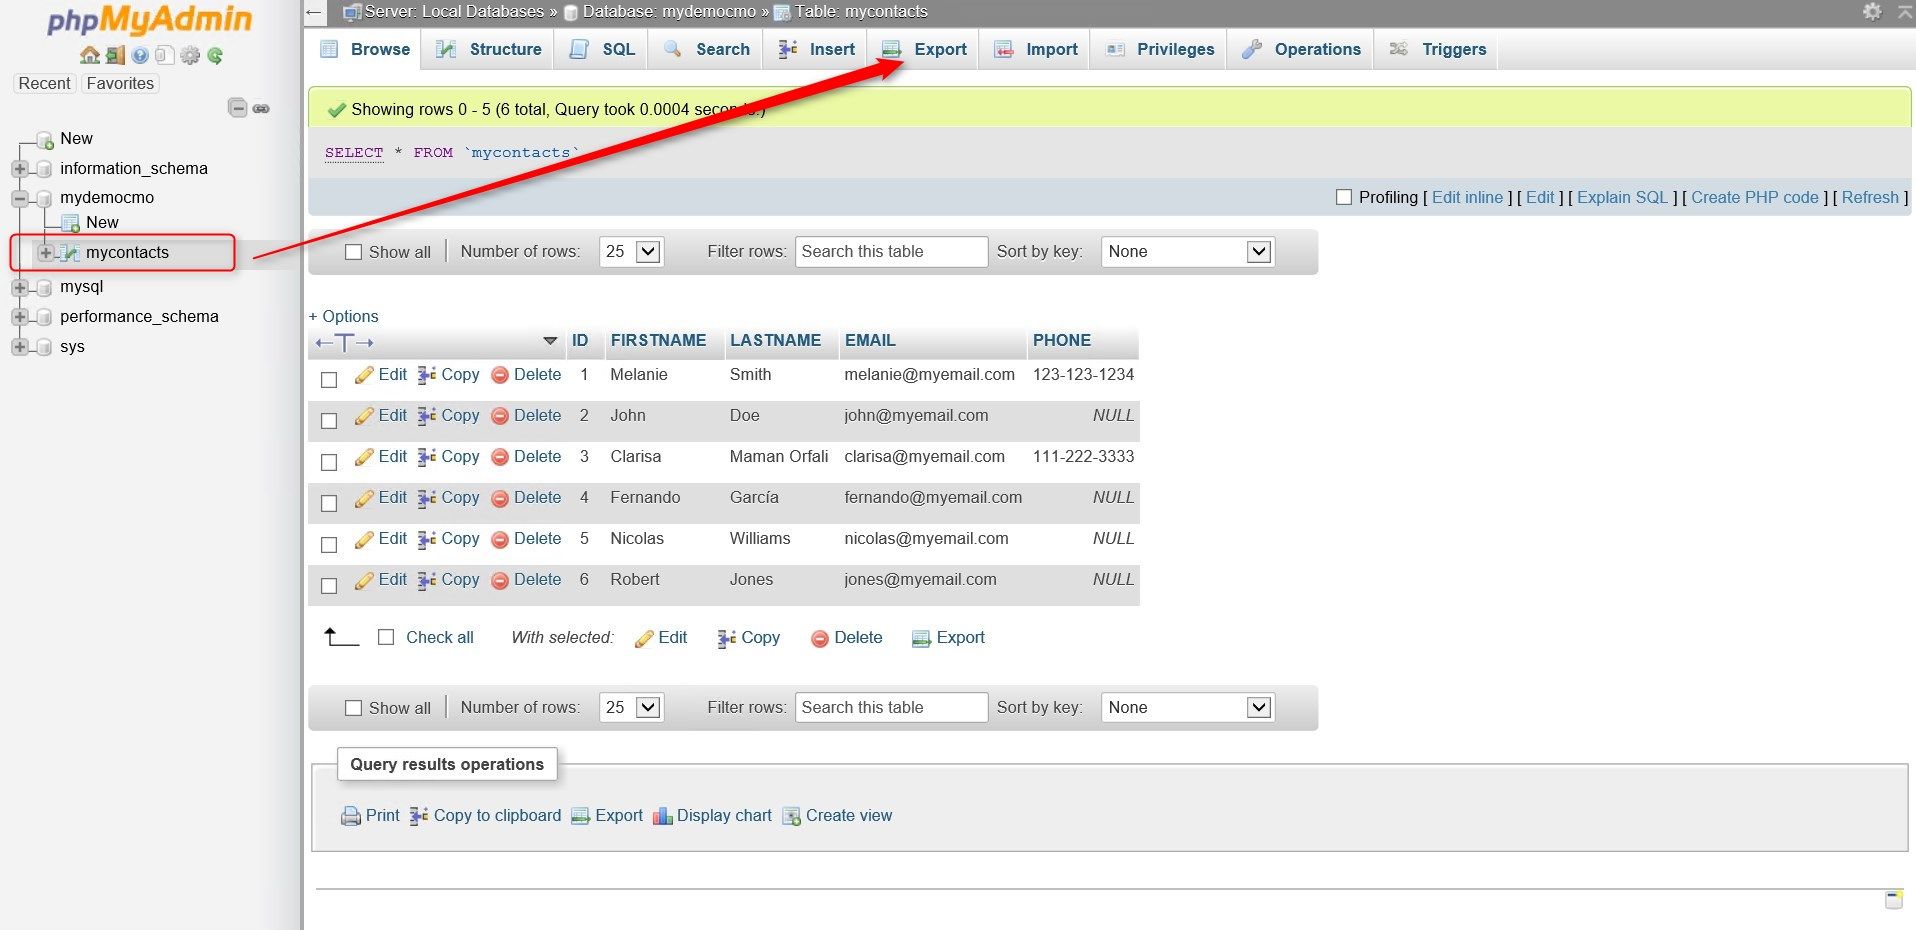
Export Operation
We can export a database table, or we can export the entire database.
If we want to export only the table, select from the left side in the list of databases, first the database and then the table. Next we select the "Export" tab.
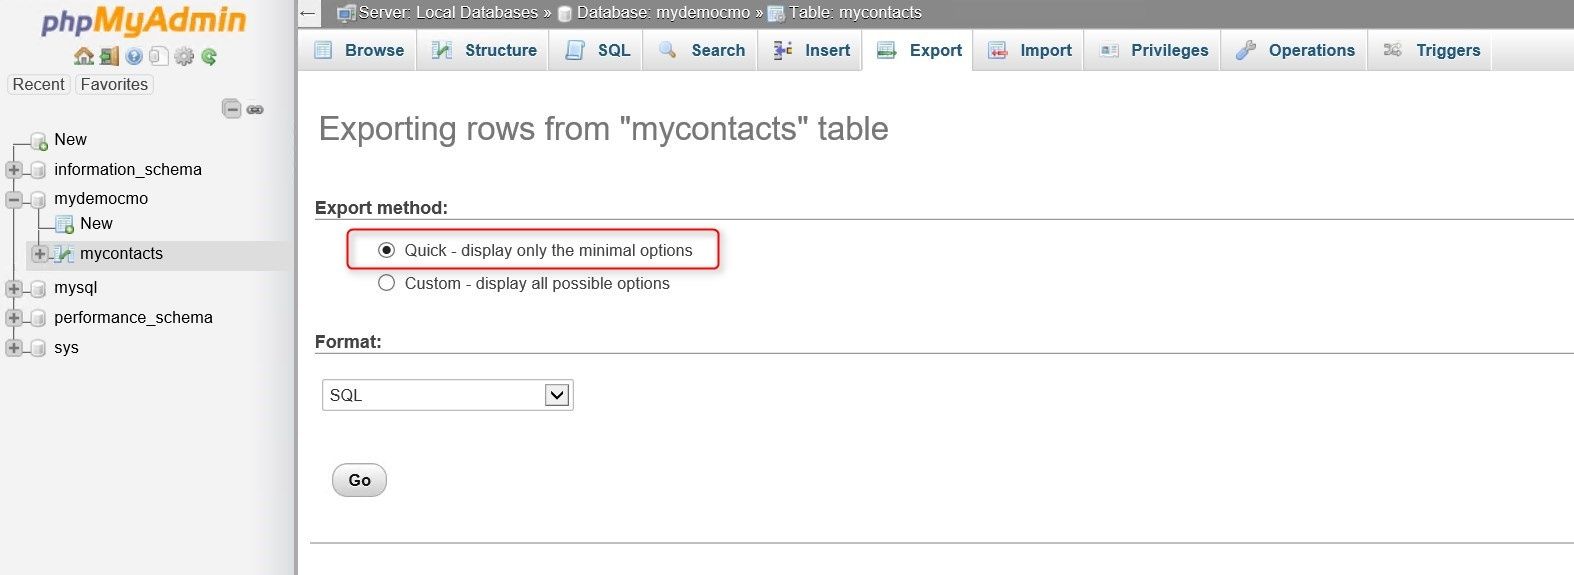
We have two methods of export: the Quick method, which shows minimum options, and the Custom method, that allows us to select and adjust the export according to different options.
Quick Method
We can select different output formats such as: SQL (default), CSV, CVS for MS Excel, JSON, PDF, PHP Array, XML, and many other formats.
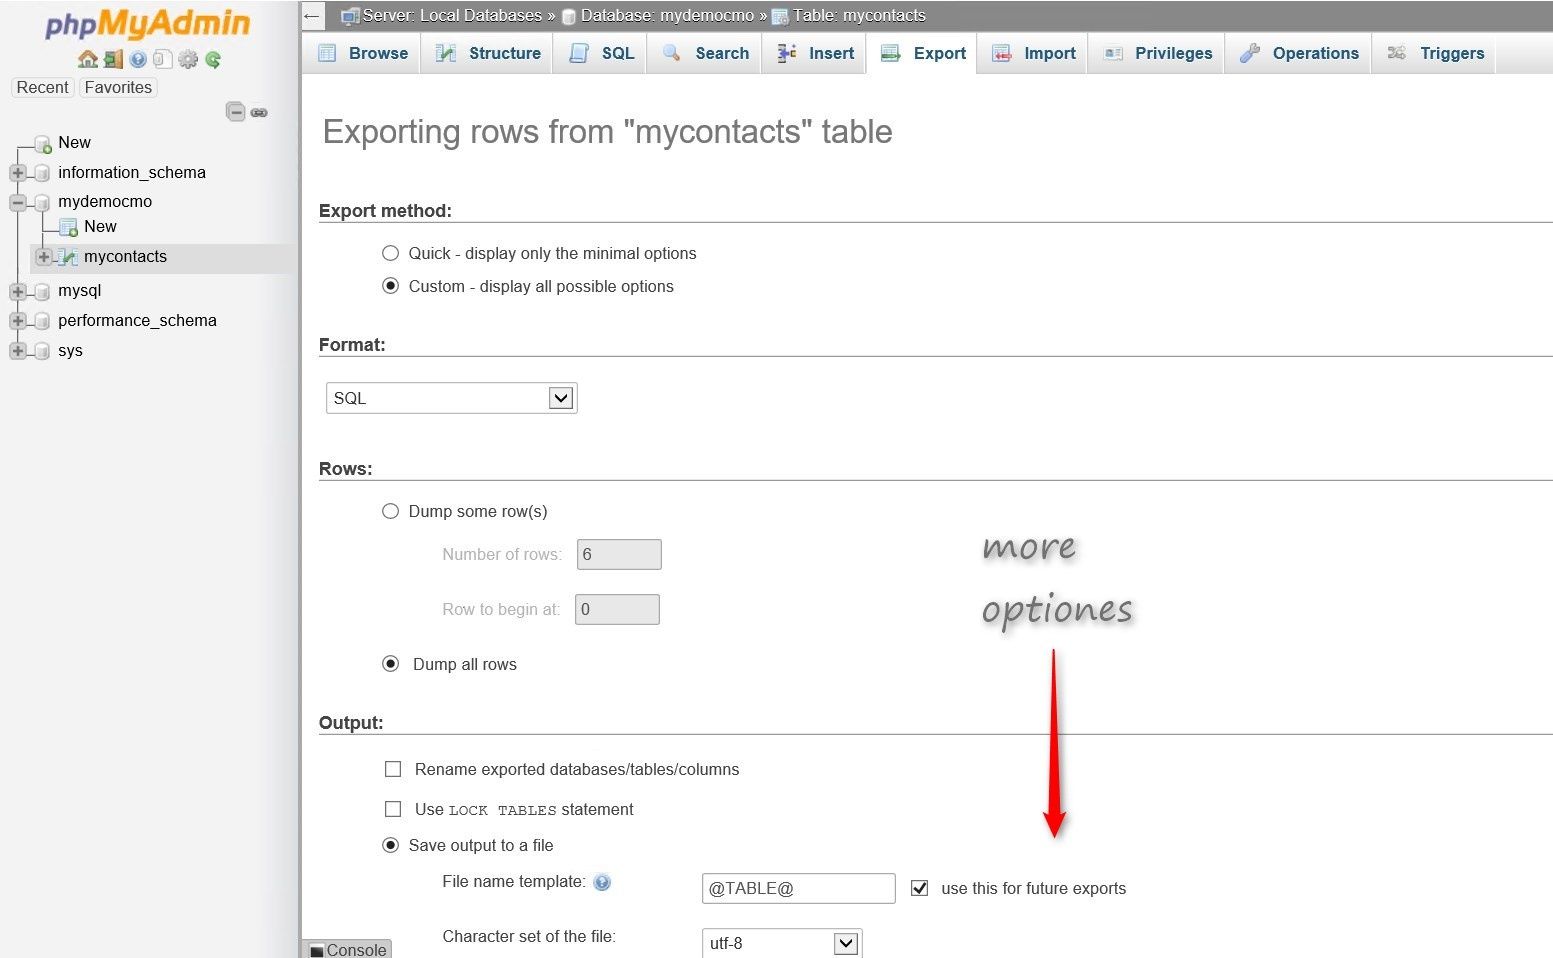
Custom Method
This allows us to define various options, such as the output format, dump of all the rows or only some rows, the name of the file to be generated, the set of output characters; and also if we want to export only the structure, only the data, or both the table structure and the table data. In addition we can select the different options for creation of objects and creation of data. When we select the Quick method all these options are configured by default.
We select the Quick method in the output format, select SQL, and then click the Go button.
We now save the generated file.
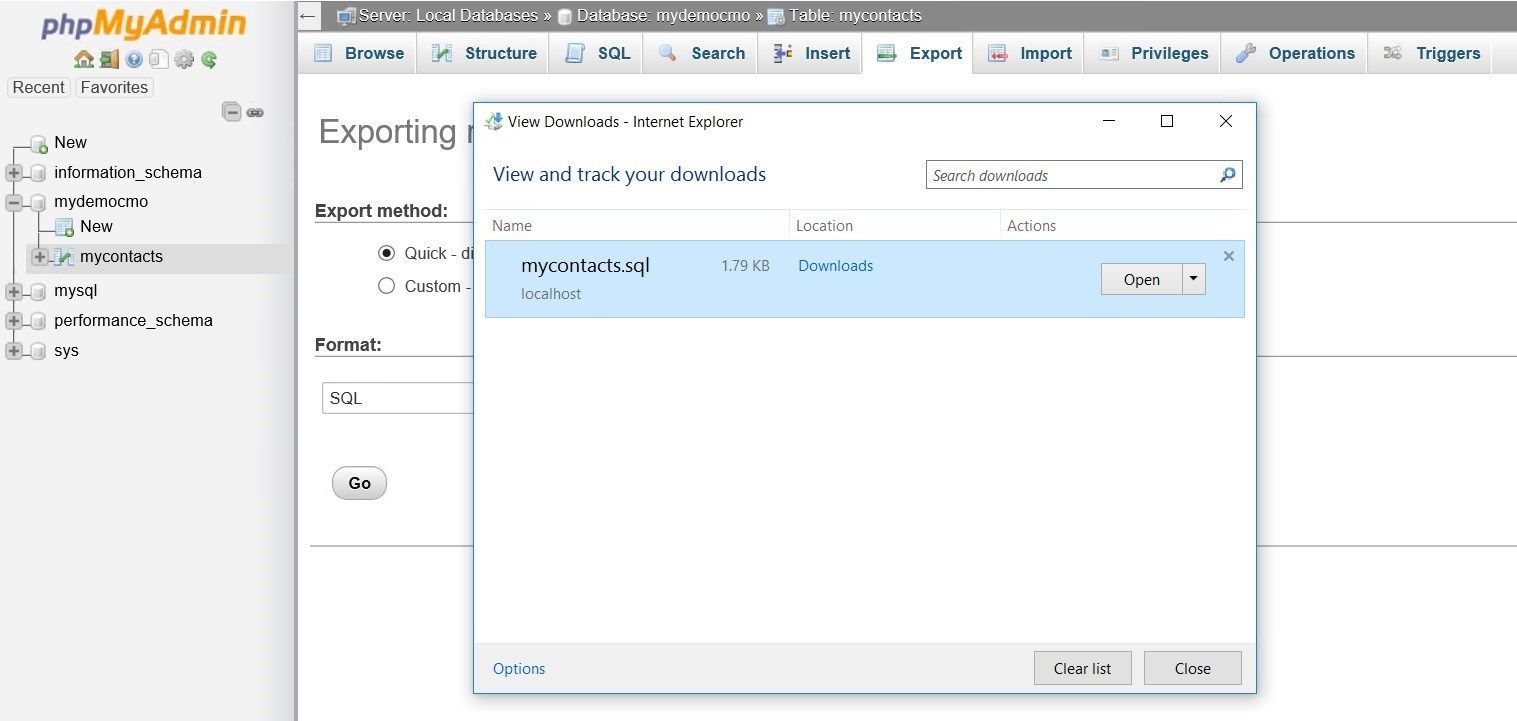
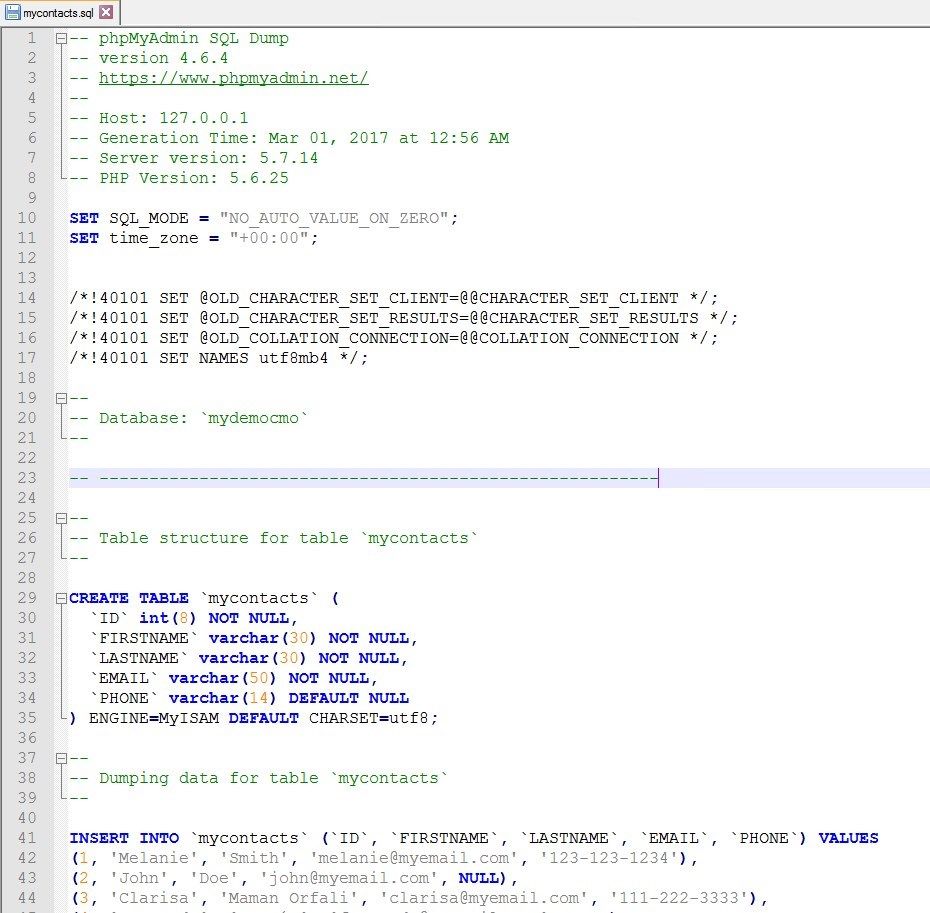
If we open the file with a text editor, we will see the contents of the file with the creation statement of the table and the insert statements to load the data in the table.
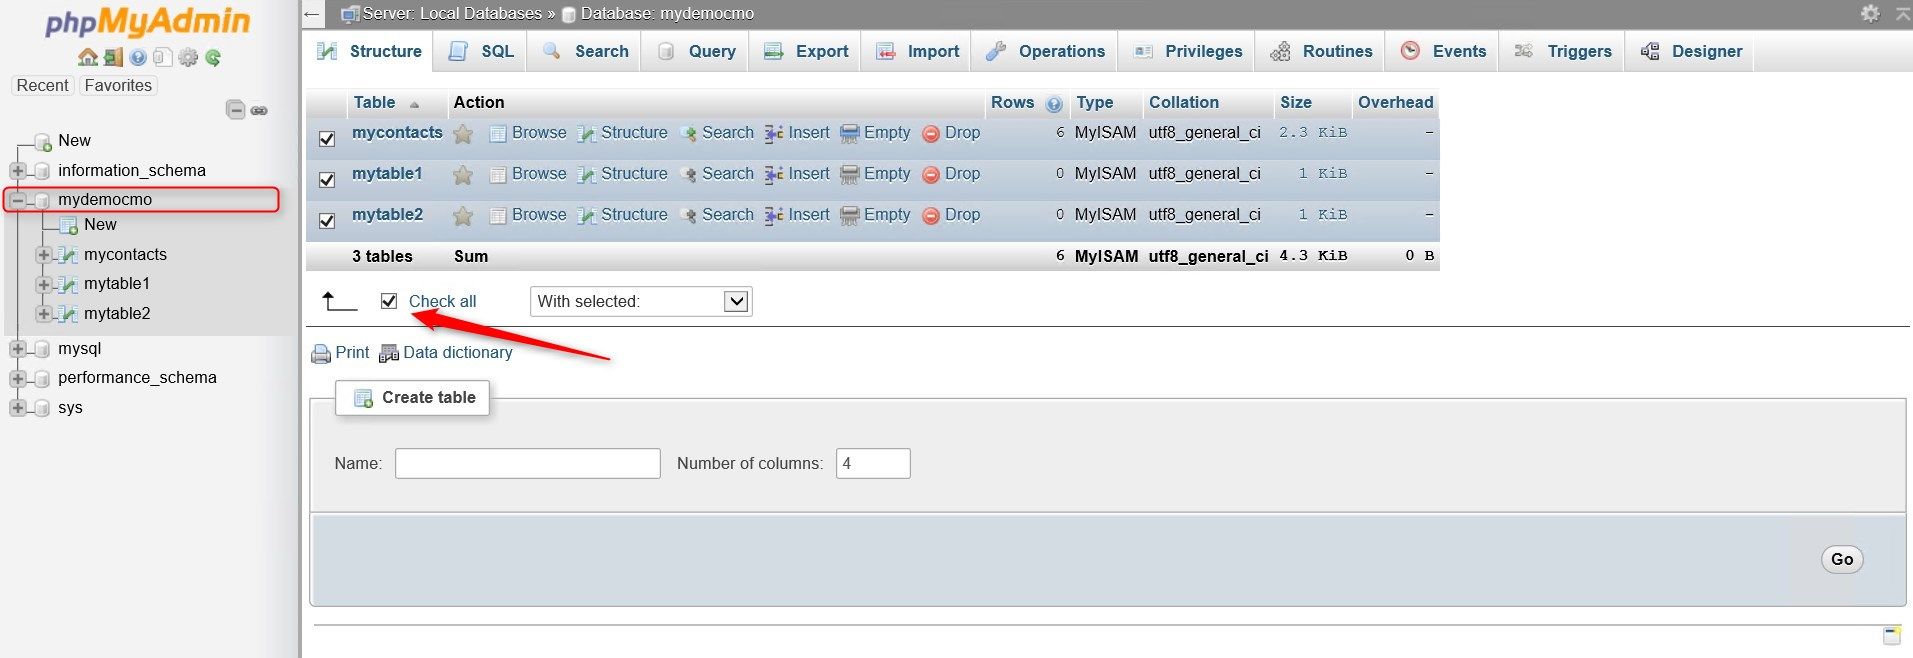
If we want to export the complete database, we simply select the database and then click on the "Check all" box below the entire list of tables that have our database in the center place (I have created two additional tables for this demonstration). In this way, all the tables in the database are selected:
Then click on the “Export” tab, and perform the operation in the same way that we export a single table.
Repair Tables Operation
Sometimes the tables in the database are damaged, but PhpMyAdmin has a functionality that allows us to fix this.
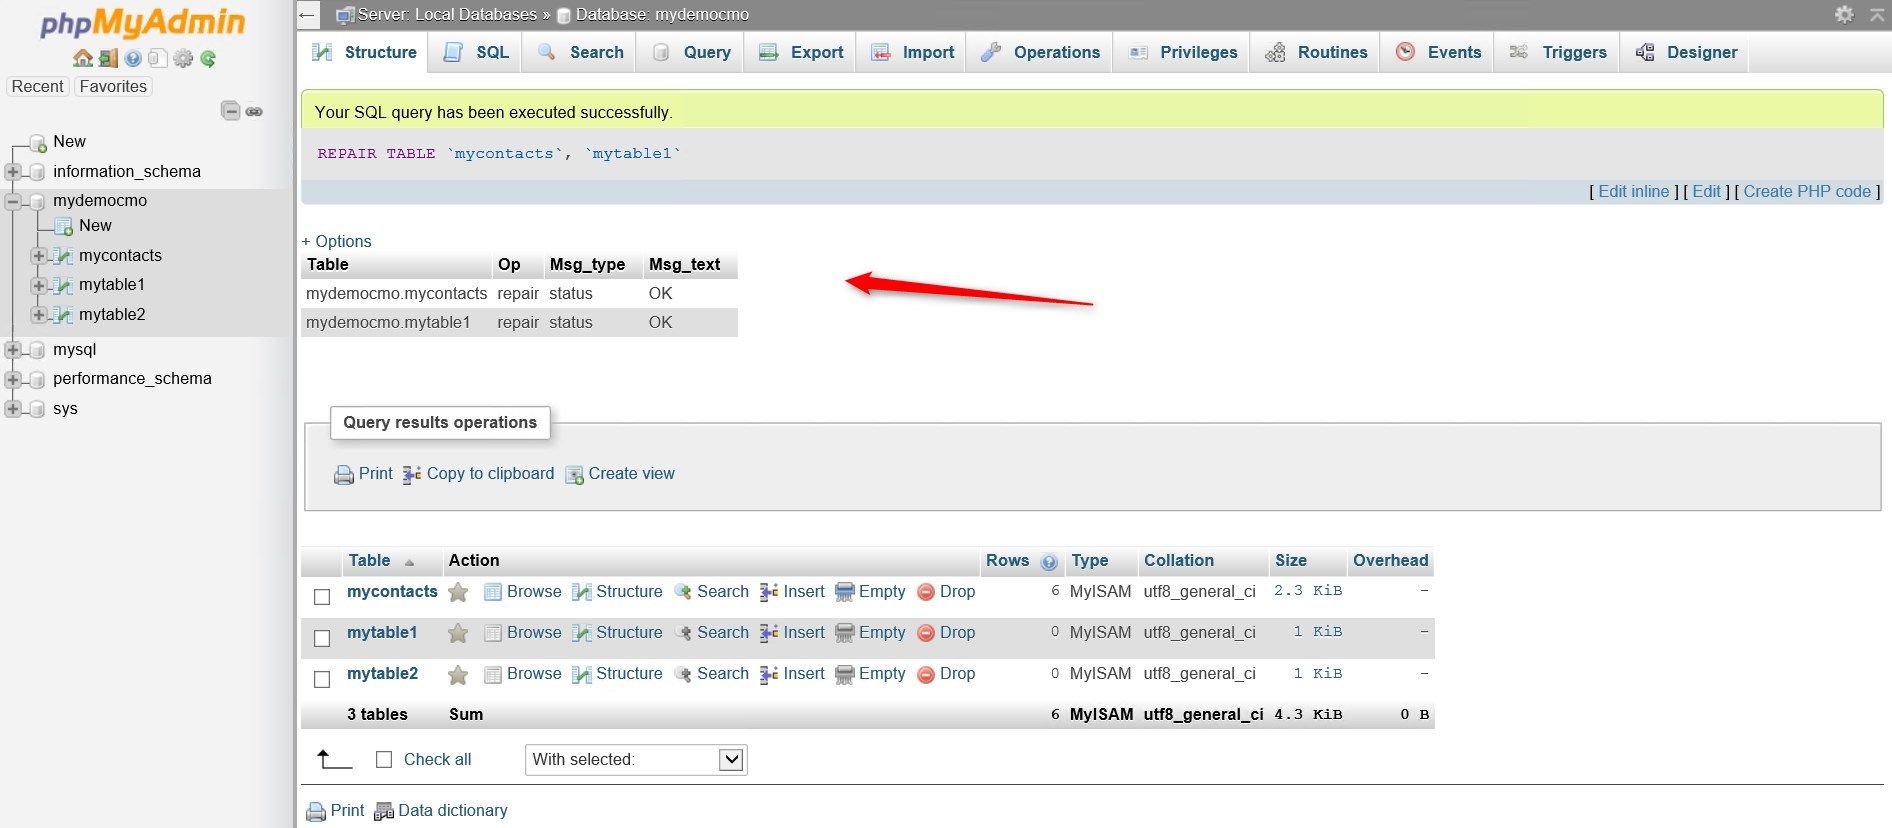
Select the database whose table we want to repair, then select the table, or tables, to repair, for example: mycontacts and mytable1, and then select the option “Repair table”.

When the tables are repaired, a confirmation message appears:
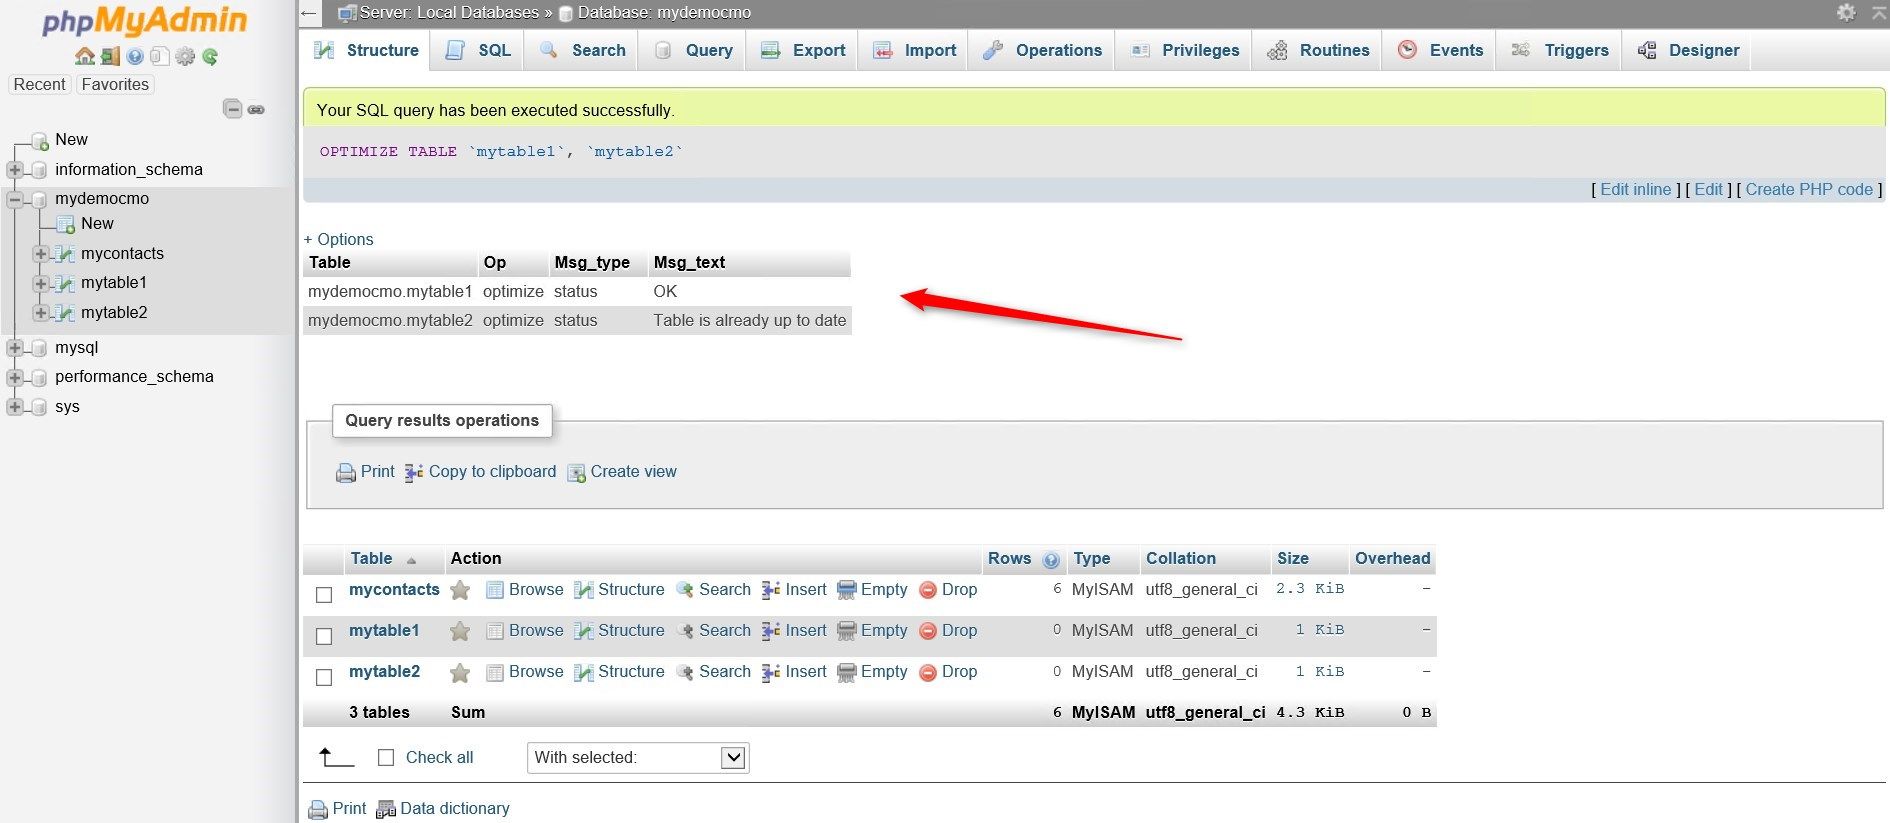
Optimize Tables Operation
In the same way that we work with a repair operation, we can optimize database tables. To do this, we select the tables that we want to optimize and from the options at the bottom of the list of tables, select "Optimize table".
When the tables are optimized, a confirmation message appears:
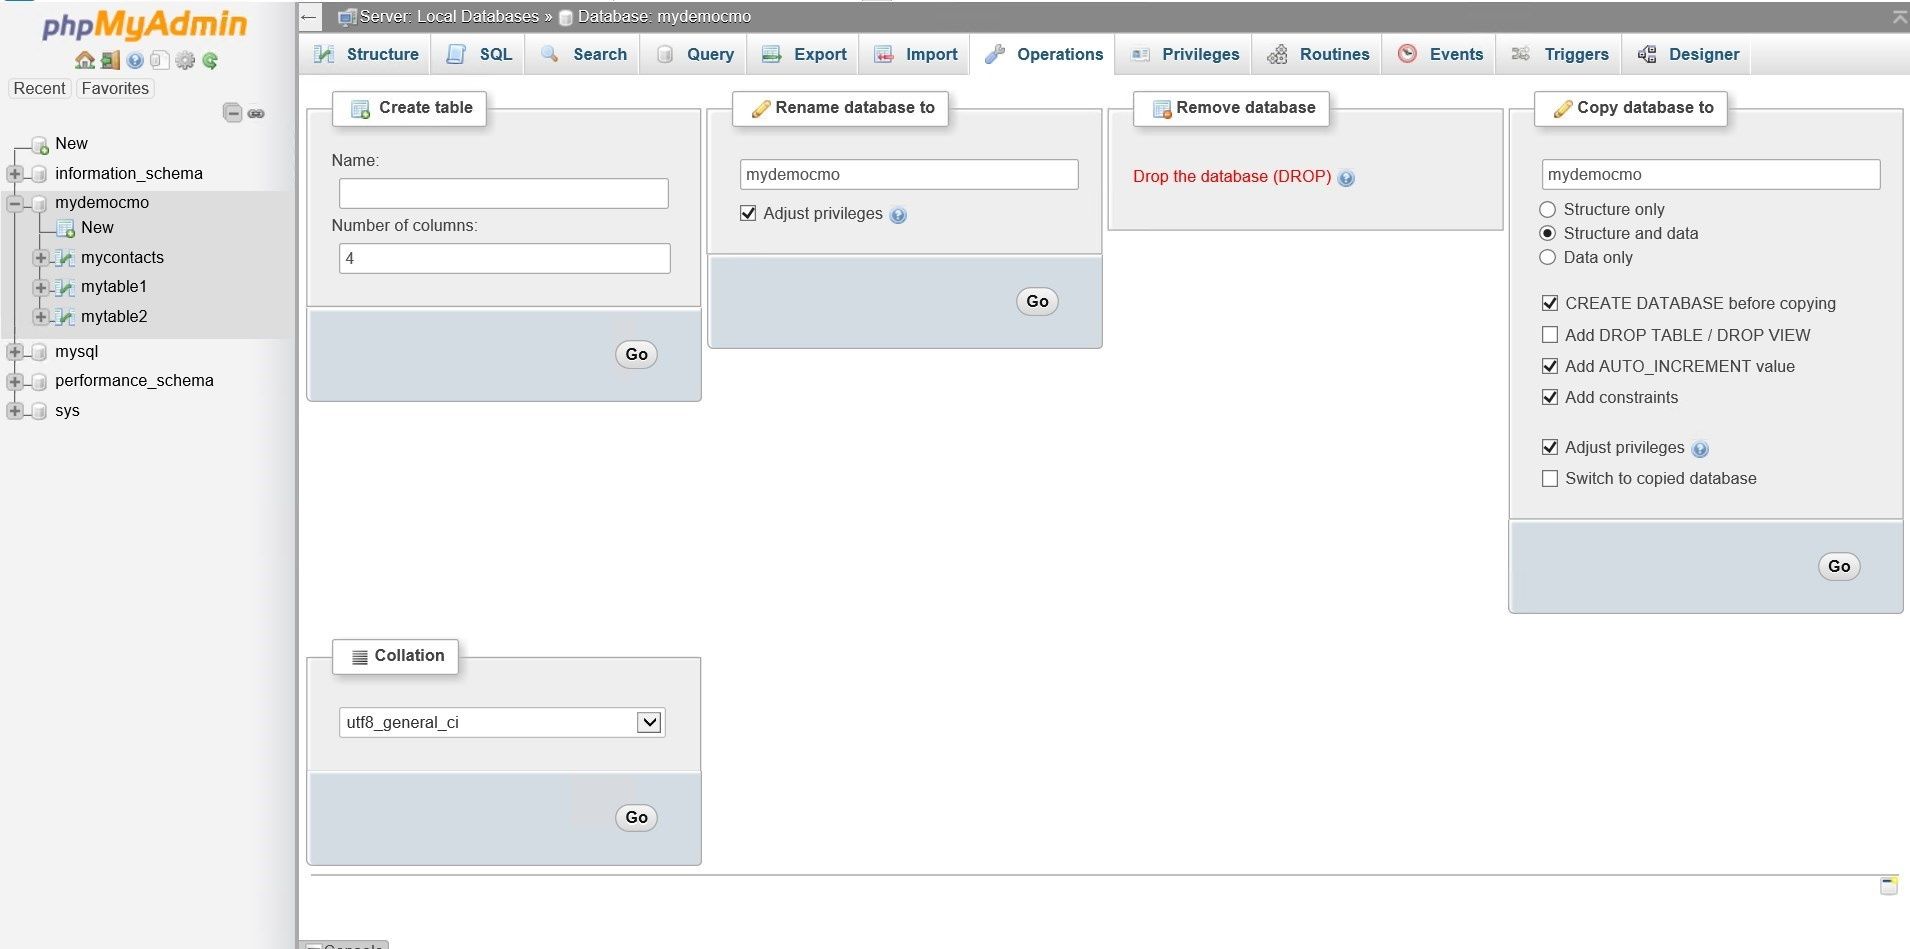
Operations Options
There are several operations that can be performed either for the database or for a specific table.
If we select the database and then the "Operations" tab, we can see all available options, such as creating tables, renaming the database, deleting the database, copying a database, and changing the collation.
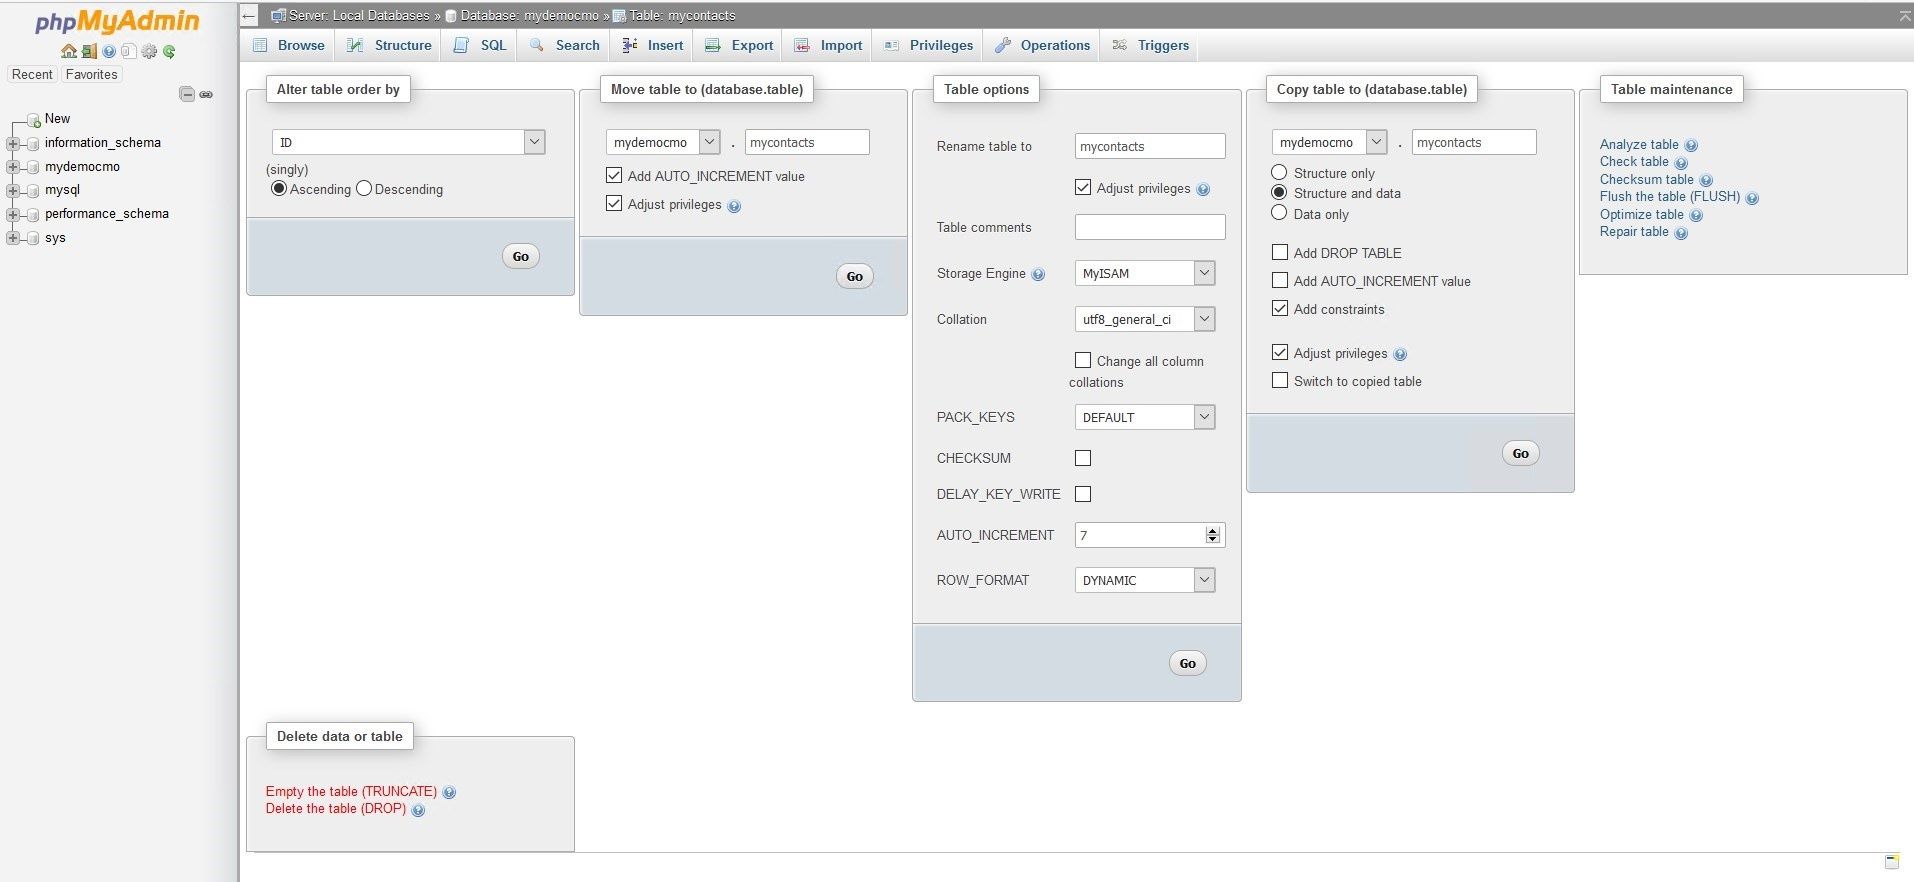
If we select a table and then click on the "Operations" tab, we can perform different operations on the table, such as modify, move, rename, copy, maintain, delete data, and many more operations.
Conclusion
As we can see, PhpMyAdmin is a very powerful application for managing the MySQL database. It’s impossible to explain in depth a single article all the features and functionalities that this great free tool has, so I invite you to visit the official website for the documentation of this application and learn more in depth of its use.
Start the discussion at forums.toadworld.com