Concerned about risks and want to lock down your Oracle client for end user Windows PCs?
Have a need for the ‘cross connection query’ feature of Toad Data Point? The solution is within your grasp!
Let’s get straight to it. You need an Oracle client to access an Oracle database from Toad Data Point. Let me share my step by step instruction in an easy-peasy-lemon-squeezy fashion!
Note 1: Oracle client is needed to access multiple data sources from Toad Data Point referred to as a ‘cross connection query’.
Note 2: This example will detail an Oracle 12c 64 bit install on Windows 10 for an Oracle 12c instance with a PDB.
Note 3: The Oracle 11g client install is almost exactly the same as the Oracle 12c client install.

here are 5 steps to this process which include:
1) Pick your Oracle client
2) Install the Oracle client
3) Disable sqlplus
4) Review registry entries
5) Configure Toad Data Point Oracle Connection
Recommendation is to review all steps before proceeding. In particular, Step 4 Review registry entries consisting of before and after screen shots. Trust me, you will feel better, empowered, and more confident in the end!
Step 1 – Pick your Oracle client
Your options within the scope of this article are an Oracle 11g or Oracle 12c client for 32 or 64 bit architecture. Consult the Oracle website for other client versions as needed.
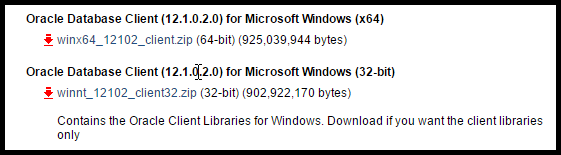
Oracle 12c client (32 and 64 bit) can be found here:
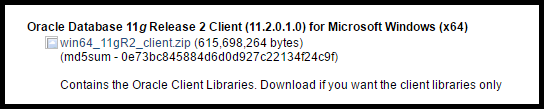
Oracle 11g 32 bit client can be found here:
http://www.oracle.com/technetwork/database/enterprise-edition/downloads/112010-win32soft-098987.html

Oracle 11g 64 bit client can be found here:
http://www.oracle.com/technetwork/database/enterprise-edition/downloads/112010-win64soft-094461.html
Pay Attention Note 1: Be careful which Oracle client you choose. If the intent is to use the Oracle client for other uses besides Toad Data Point, BE FOREWARNED some legacy systems will only work with a 32 bit Oracle client. Please understand your environment before choosing an Oracle client.
Toad Data Point will work seamlessly with either the 32 or 64 bit Oracle 11g or Oracle 12 client.
Step 2 – Install the Oracle client
Locate the downloaded Oracle 12c 64 bit client zip file.
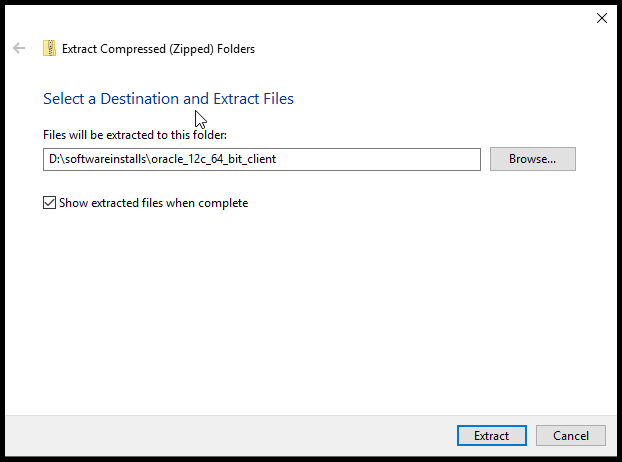
Right click on file and extract into a directory.
Enter a directory to extract files.
Click Extract. Note: This could take a few minutes.
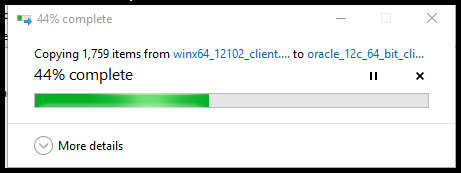
Working…
Oracle 12c 64 bit client has now been extracted
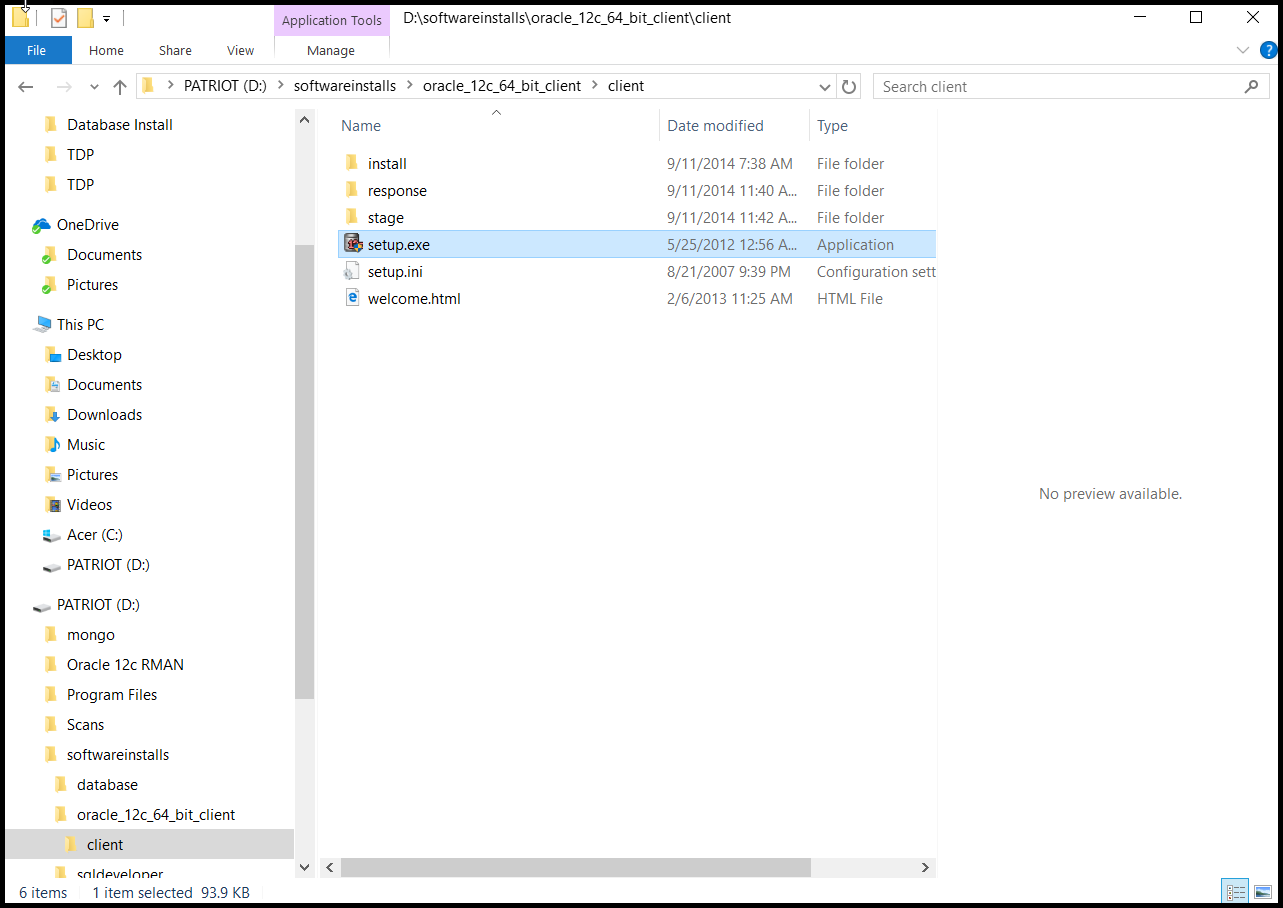
Double click ‘setup.exe’.
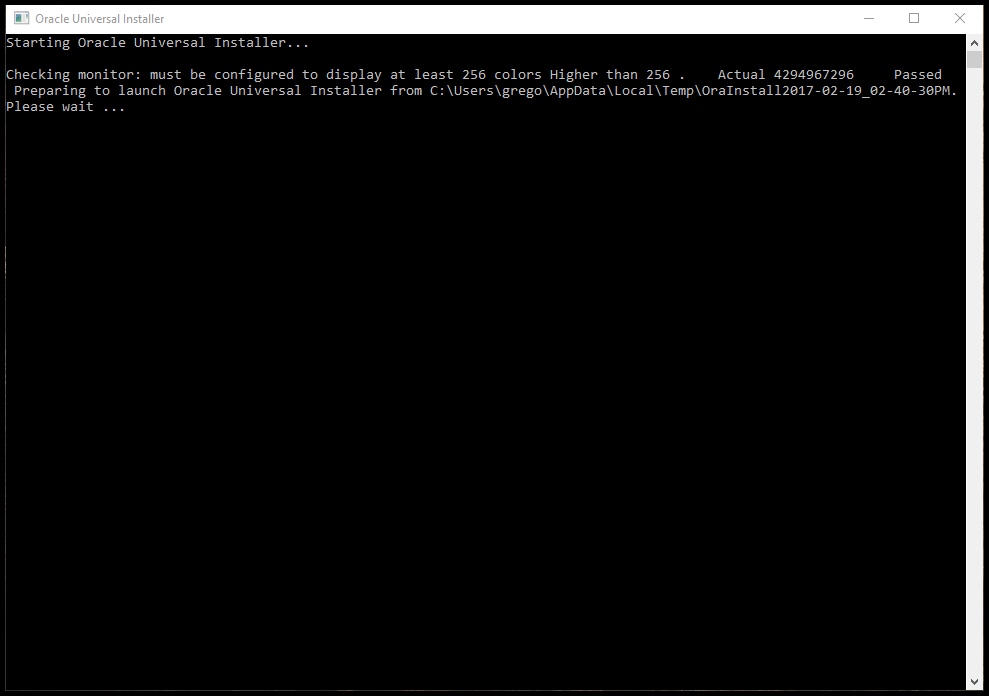
This may test your patience, let it work! (Sometimes a minute or less can seem like an eternity).
Don’t touch anything!
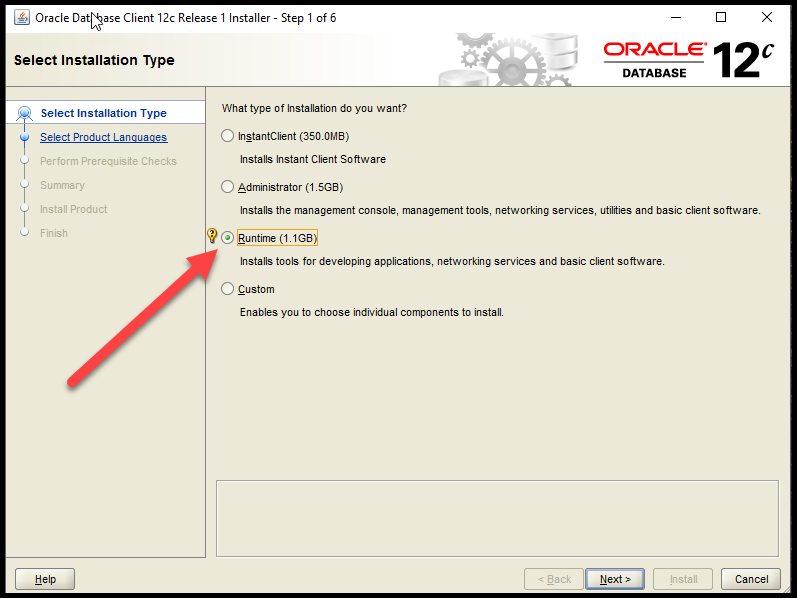
Pay Attention Note 2: Critical decision time now! The default is the ‘Instant Client’ which will allow for Oracle connections to one Oracle database at a time. If your users need the Toad Data Point ‘cross connection query’ feature (most will) DO NOT install the ‘Instant client’.
Pay Attention Note 3: Choosing the ‘Runtime’ option will eliminate any Oracle client Administrator tools enabling LOCKDOWN and saving 0.4 GB of local end user Windows PC disk space. Toad Data Point ‘cross connection query’ feature will still work. Stay with me and continue to follow the instructions.
Choose the ‘Runtime’ option.
Click Next.
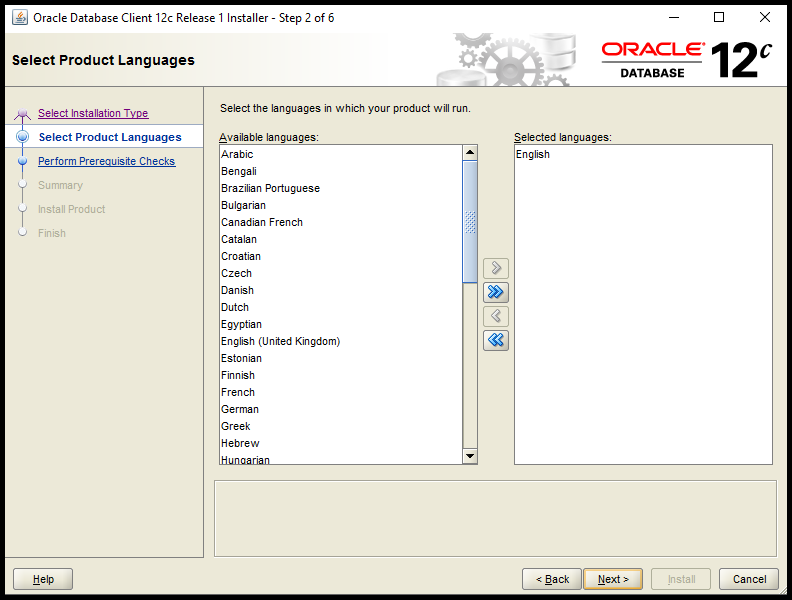
Choose language.
Click Next.
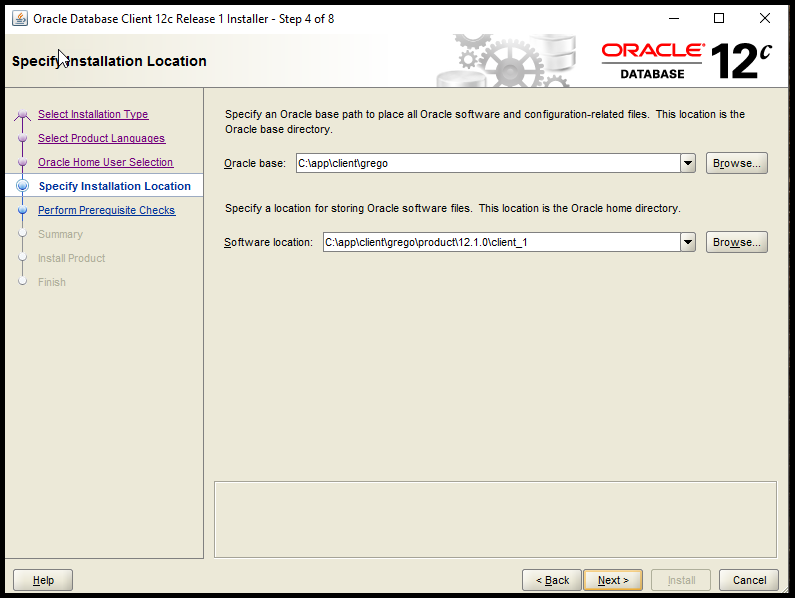
Accept the defaults – my preference.
Or change to reflect your own environment.
Click Next.
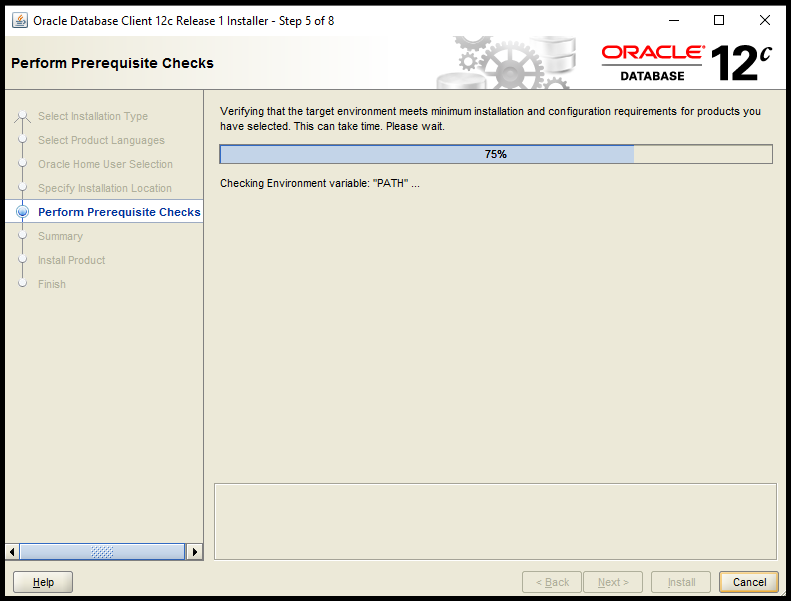
Working…
Relax, the Prerequisite Check should complete successfully momentarily. If not, check the log files and correct as directed.

Accept the default Windows Built-in Account – my preference.
Click Next.
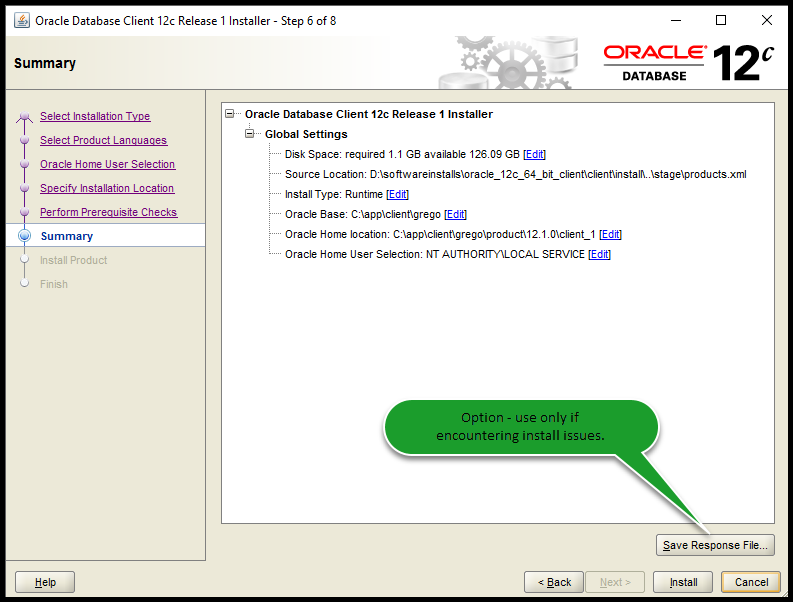
Verify Global Settings. No changes should be required at this point.
My preference is to not save the response file.
Option: Click ‘Save Response File’. A screen will appear to enter a filename to record the install responses. Use this option if you are having issues installing the Oracle Client. Response file log entries will help in debugging any issues that may occur. Rarely have I seen any issues during this part of the Oracle 11g/12c client install.
Click Install.
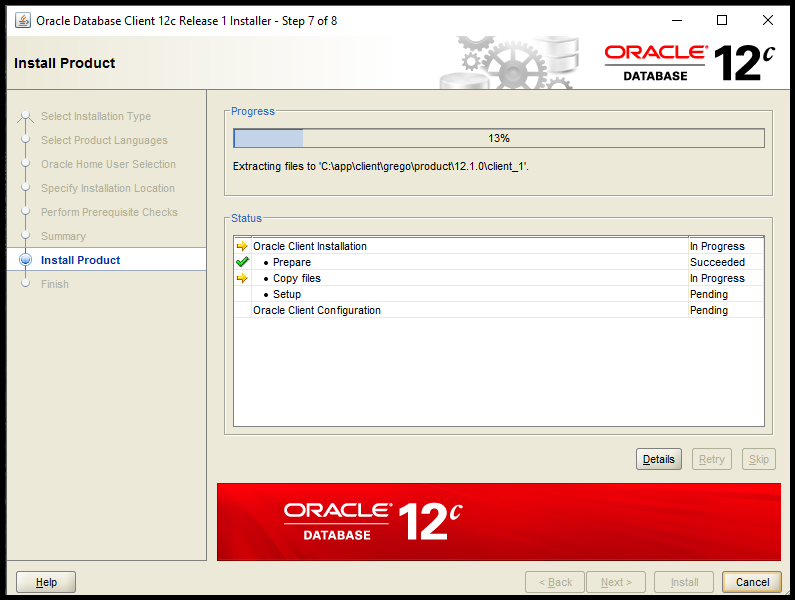
Be patient, the process is working.
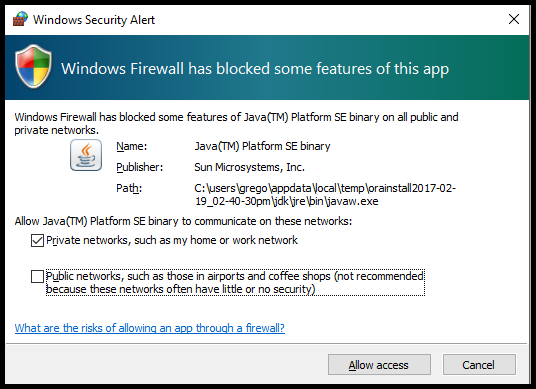
Pay Attention Note 4: The default is ‘Public networks, such as those in airports and coffee shops …’. Depending on your local JAVA implementation, you may or may not get this message. If you do, it is HIGHLY RECOMMENDED to CHANGE the default to ‘Private networks, such as my home or work network’.
Click Allow Access.
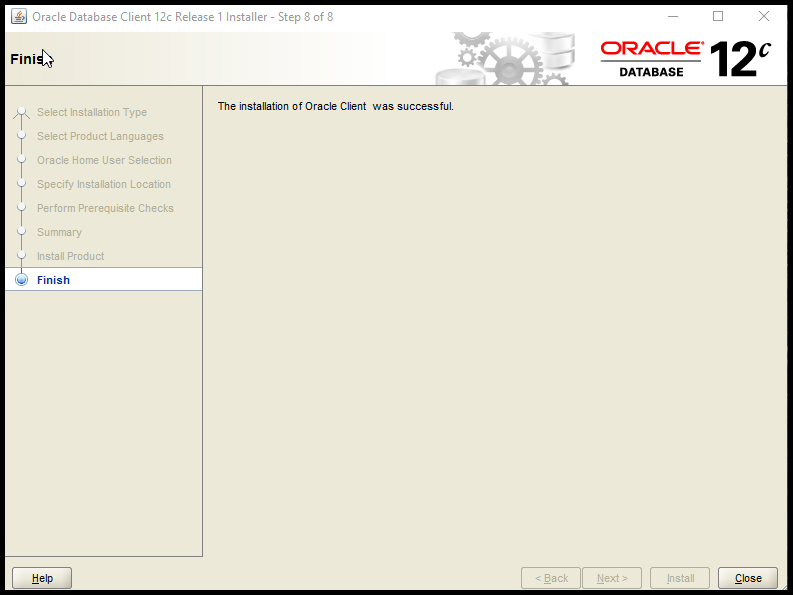
Success!! Party time!
You have now just installed the Oracle 12c 64 bit client!
Click Close!

Step 3 – Disable sqlplus
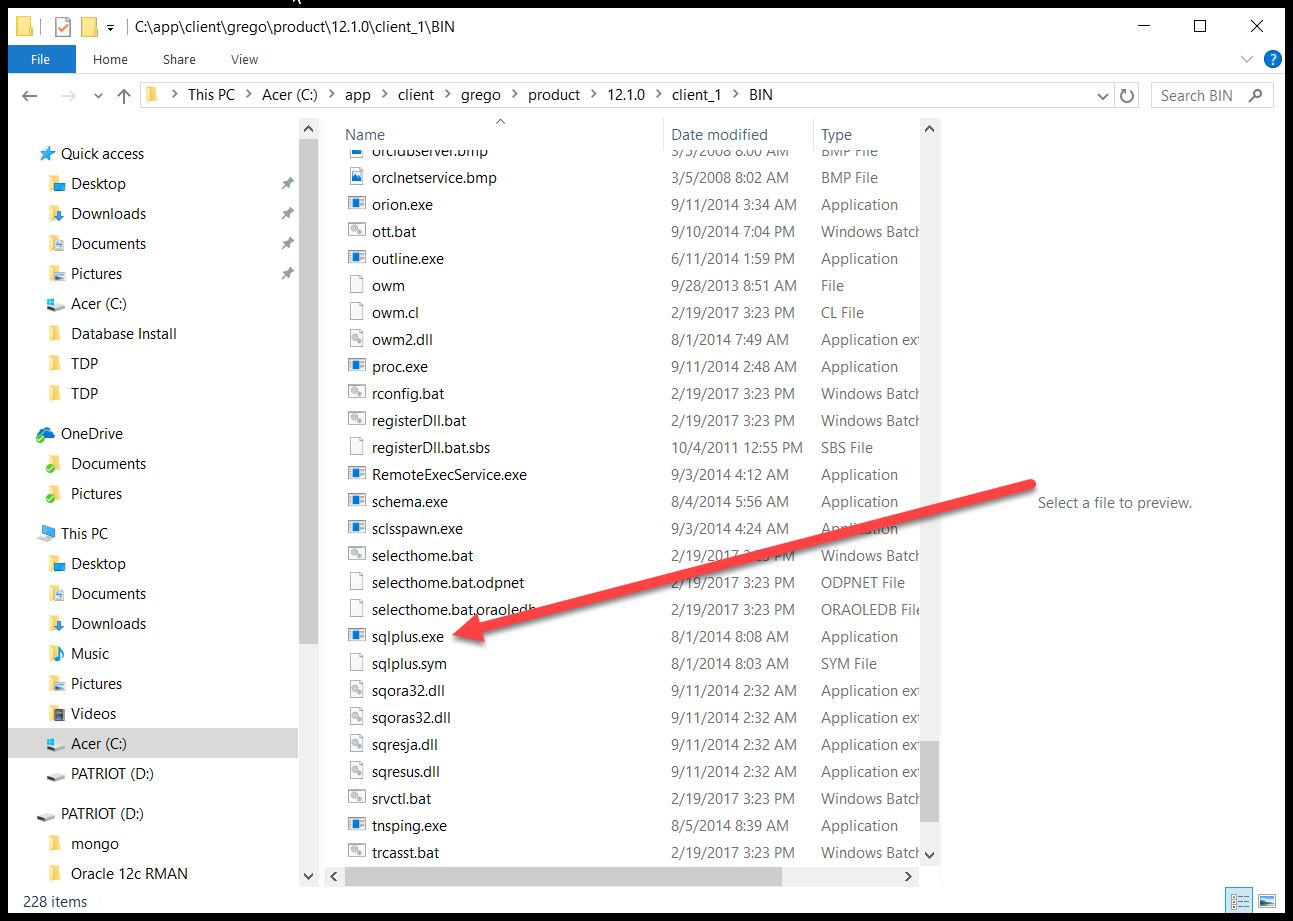
The sqlplus.exe installed with the Oracle client opens the door for access to Oracle databases.
To reduce risk exposure delete or rename the sqlplus.exe file in the directory where the Oracle 12c client was installed.
This is the final LOCKDOWN step in this article.
Let’s review.
- The Oracle 12c client has been installed with the ‘Runtime’ option thus eliminating any Administrator tools.
- The sqlplus.exe file has been deleted or renamed from the client computer.
- The Oracle 12 client has now been installed lightweight and securely but still providing all the functionality required for connecting to Oracle databases.
- Toad Data Point users can now use the ‘cross connection query’ feature when connected to an Oracle database.
You have past the half way point, only 2 steps go!!!
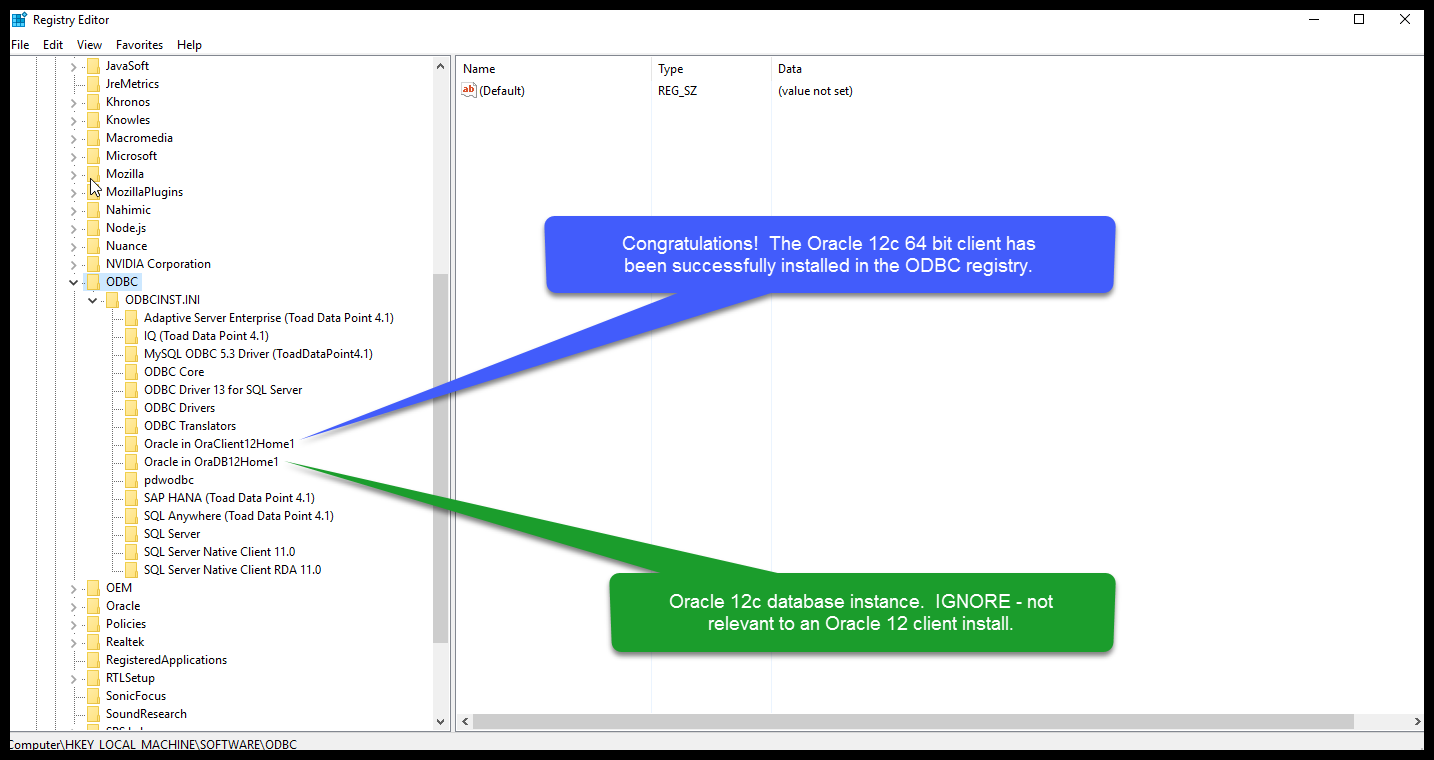
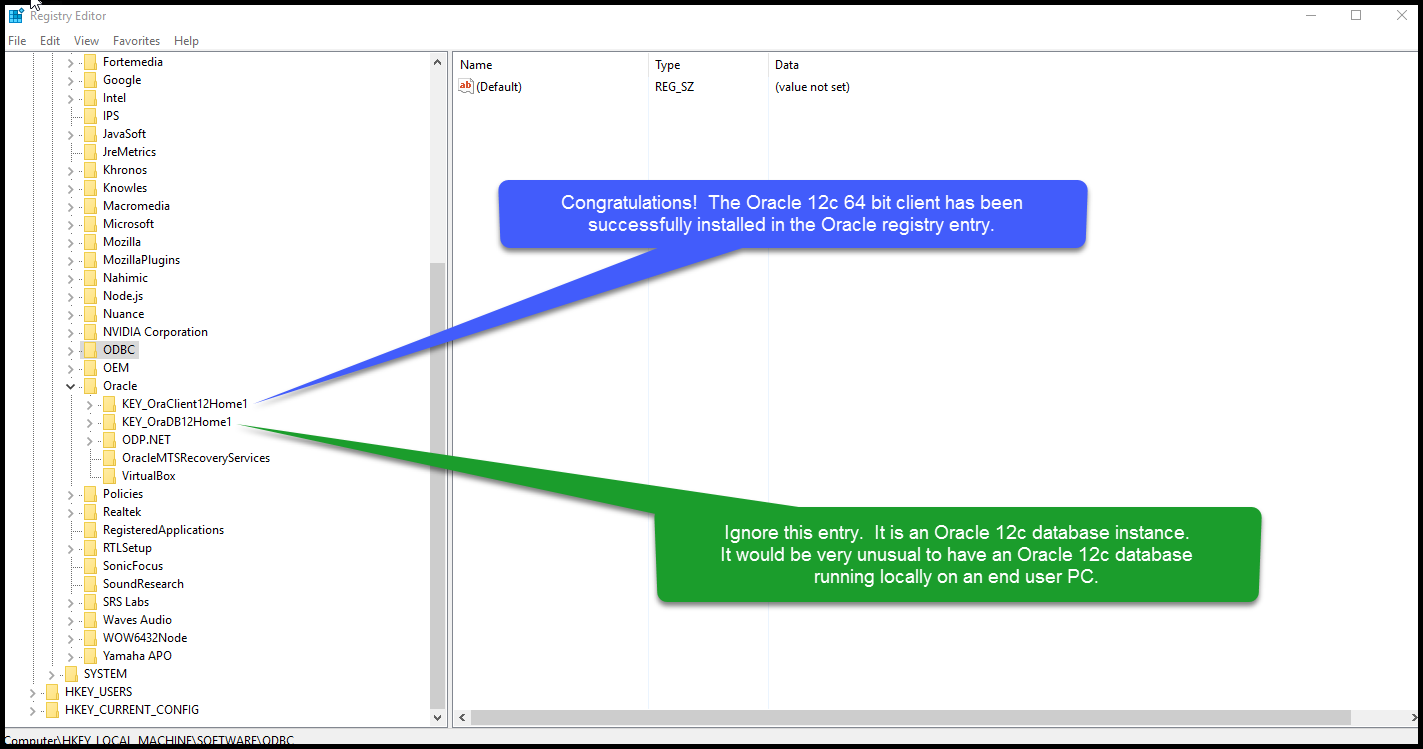
Step 4 – Review registry entries

Start the Windows registry editor.
Purpose of reviewing registry entries is to understand the heart of where the Oracle client is setup for Windows. It is highly recommended not to change any registry entry values for the Oracle client.
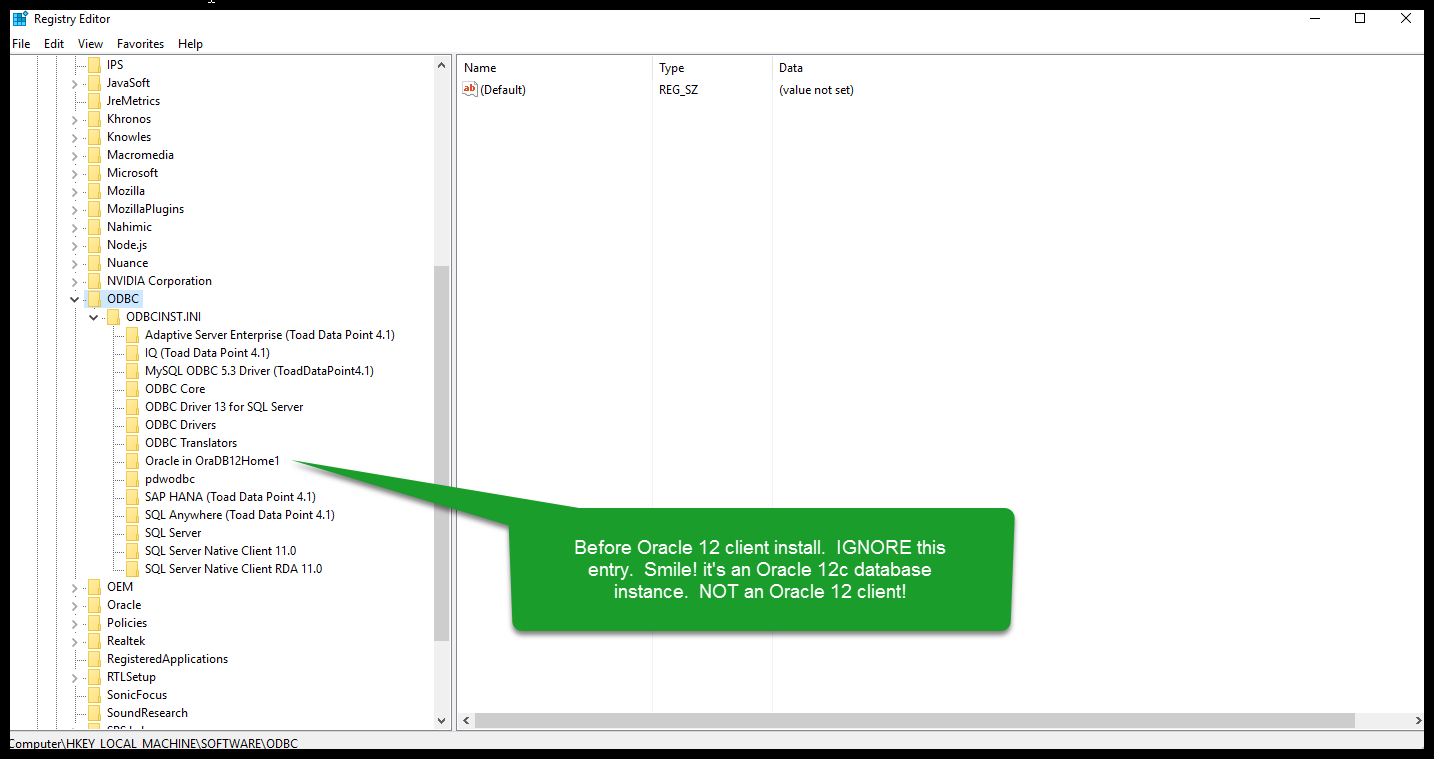
BEFORE Oracle Client Install
HKEY_LOCAL_MACHINE  -->SOFTWARE --> ODBC
BEFORE Oracle Client Install
HKEY_LOCAL_MACHINE --> SOFTWARE --> Oracle
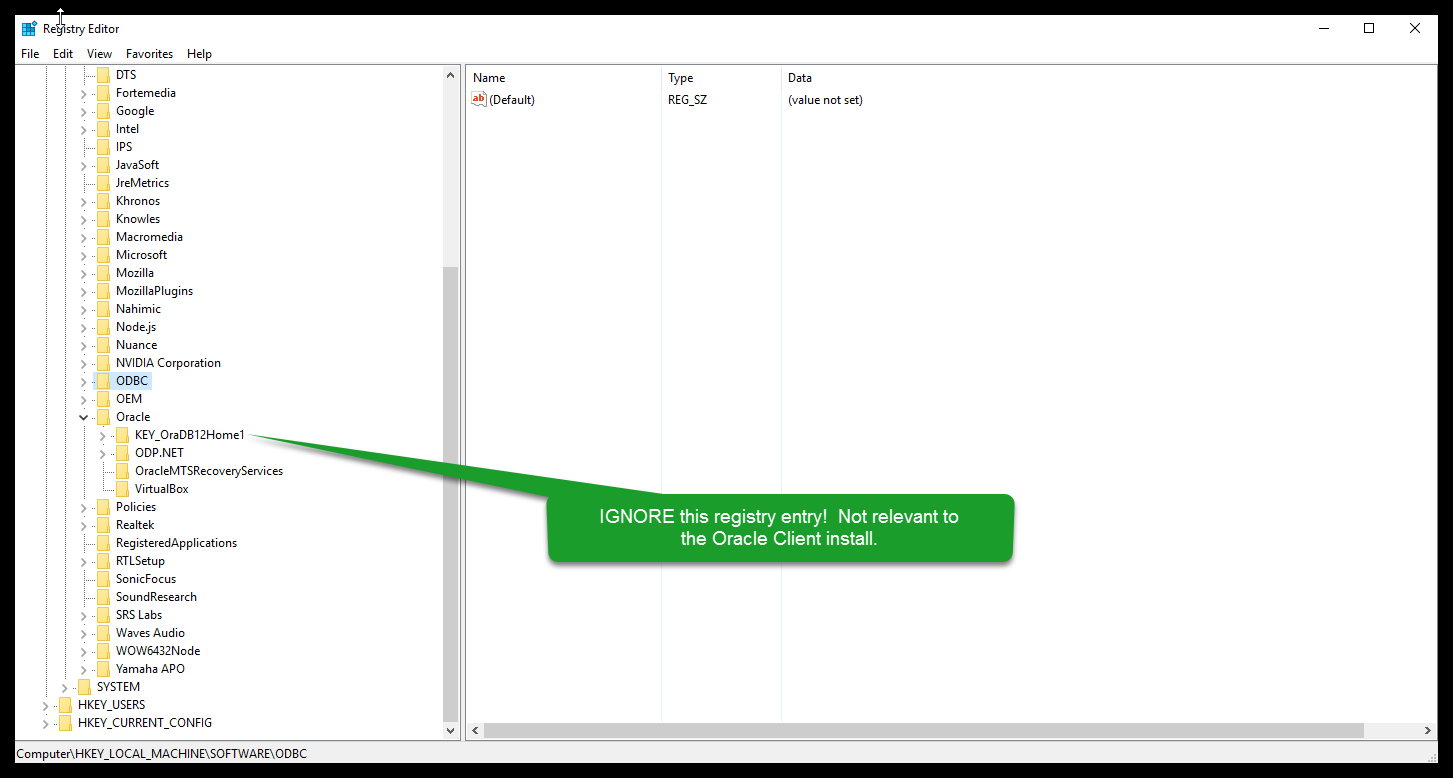
This PC has an Oracle database instance running. This would be highly unusual for an end user. The KEY_OraDB12Home1 is the Oracle database home.
AFTEROracle Client Install
HKEY_LOCAL_MACHINE -->SOFTWARE --> ODBC
AFTER Oracle Client Install
HKEY_LOCAL_MACHINE --> SOFTWARE -->Oracle
Step 5 – Configure Toad Data Point Oracle Connection
After installing the Oracle client, setting up a TNS entry is recommended. It’s easy – let me show you!
Ooooh, the magic TNS_ADMIN environment variable. Many people forget this step which can cause chaos and mayhem.
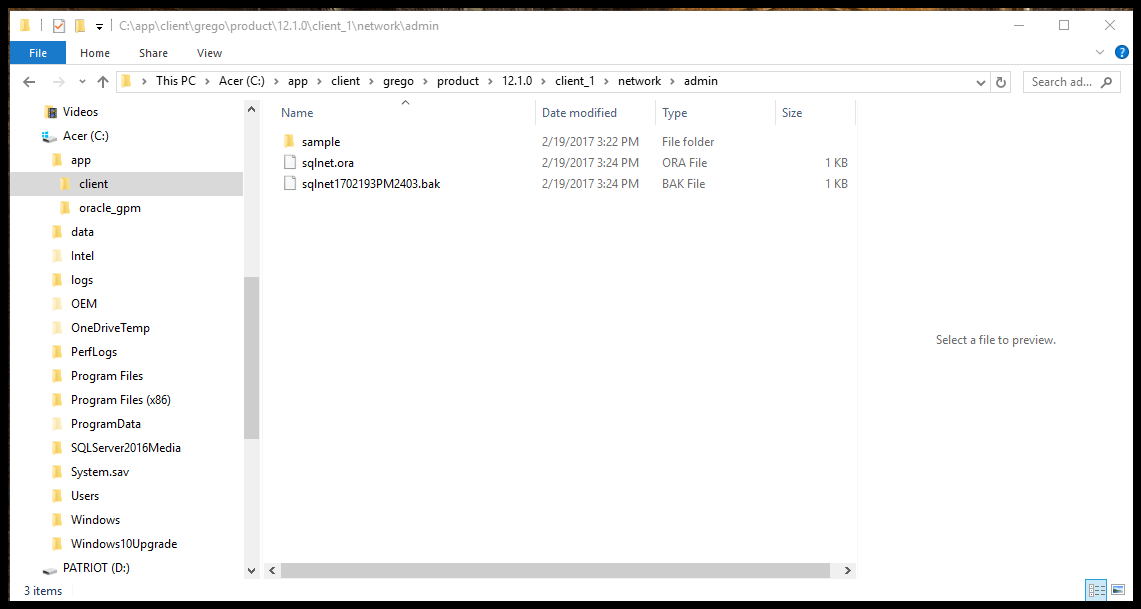
First, create the tnsnames.ora file which can be placed anywhere on a client Windows PC.
My preference is to place the file in the Oracle 12c client directory structure as shown below.
Create a file called tnsnames.ora with your specific database connection information similar to the examples below. There are many different and correct ways to specify a tnsnames.ora entry. Consult with your Oracle DBA for TNS entry information specific to your Oracle environment.
Oracle 12c with CDB/PDB configuration
PDB2 =
  (DESCRIPTION=
    (ADDRESS = (PROTOCOL = TCP)(HOST = localhost)(PORT = 1521))
    (CONNECT_DATA=
      (SERVER = dedicated)
      (SERVICE_NAME = pdborcl)
    )
  )
Note: The CDB/PDB tnsnames entry will require an entry into the listener.ora file similar to this:
    (SID_DESC =
      (GLOBAL_DBNAME = pdborcl)
      (SID_NAME = pdborcl)
    )
Oracle 11g or Oracle 12c (No CDB/PDB) standalone database
DEV.ABC.NETWORK=
  (DESCRIPTION=
    (ADDRESS=
      (PROTOCOL=TCP)
      (HOST=server01.abc.network)
      (PORT=1521)
    )
    (CONNECT_DATA=
      (SERVER=dedicated)
      (SID=dev)
    )
  )
Example of a tnsnames.ora file and location
C:Usersgrego>cd C:appclientgregoproduct.1.0client_1networkadmin

C:appclientgregoproduct.1.0client_1networkadmin>
C:appclientgregoproduct.1.0client_1networkadmin>type tnsnames.ora
PDB2 =
  (DESCRIPTION=
    (ADDRESS = (PROTOCOL = TCP)(HOST = localhost)(PORT = 1521))
    (CONNECT_DATA=
      (SERVER = dedicated)
      (SERVICE_NAME = pdborcl)
    )
  )
C:appclientgregoproduct.1.0client_1networkadmin>
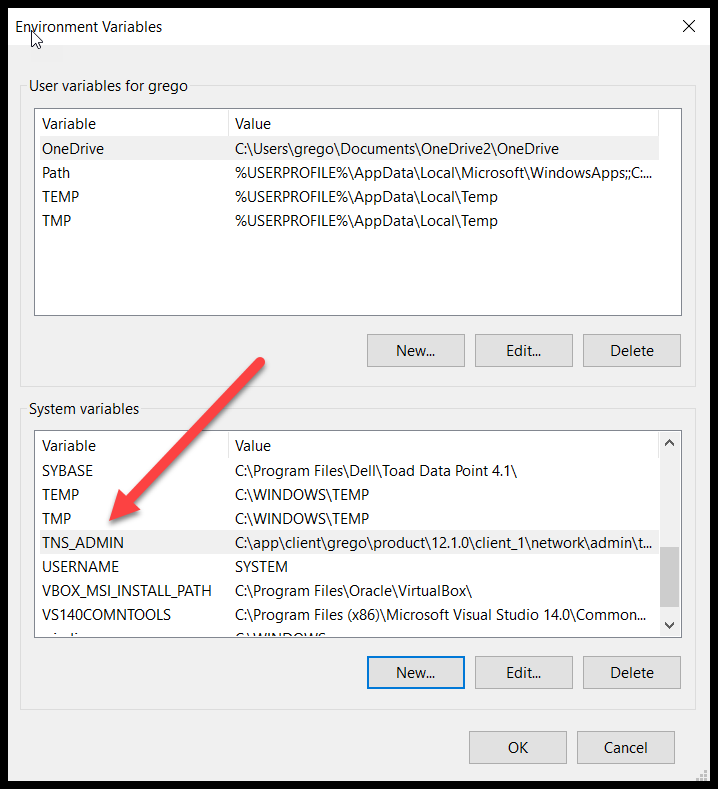
Now let’s go create the TNS_ADMIN environment variable!!
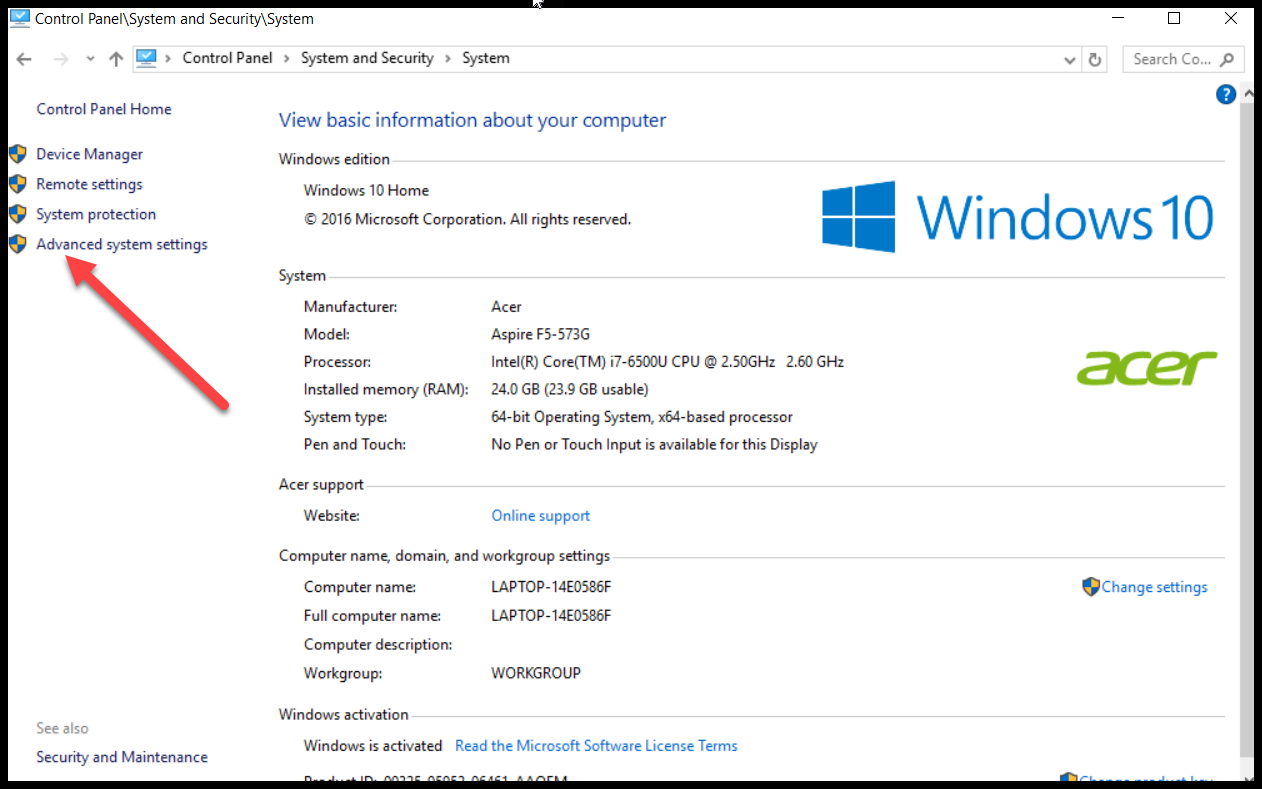
Click ‘Advanced system settings’.
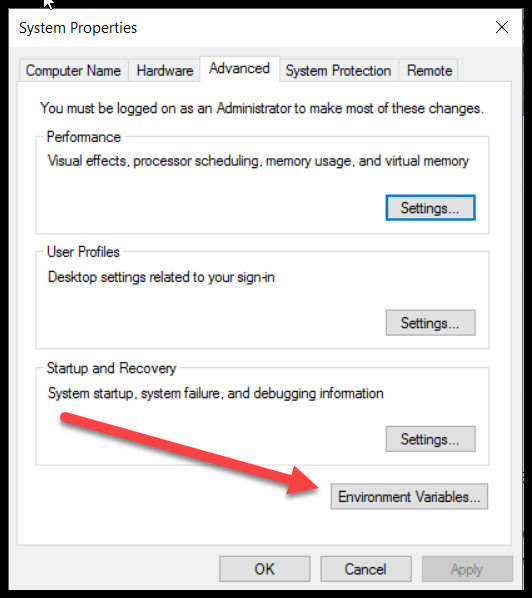
Click ‘Environment Variables’.
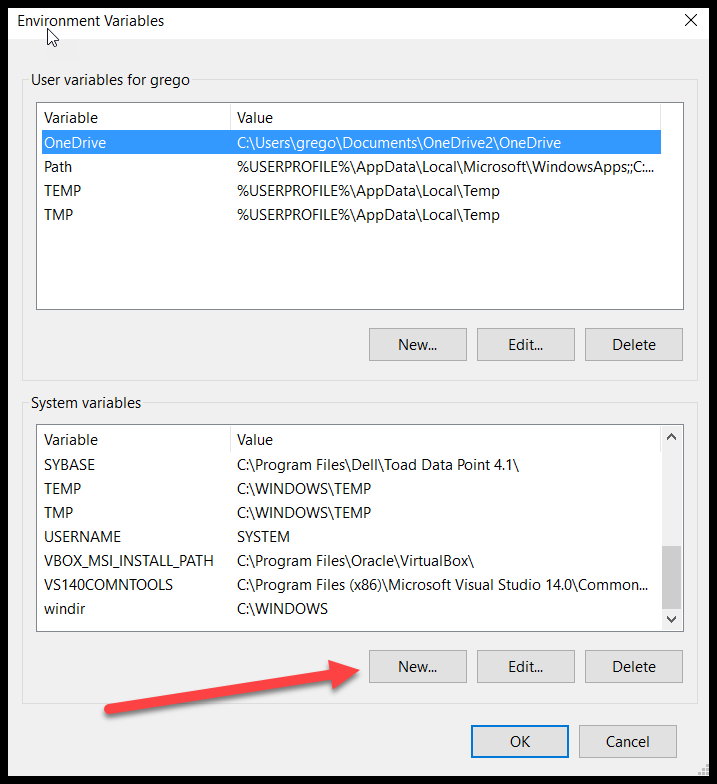
In this case, the TNS_ADMIN environment variable does not exist in the list above. We need to create a TNS_ADMIN variable and point it to the tnsnames.ora file created earlier.
If the TNS_ADMIN environment variable already exists the PC has already been configured. Consult with a DBA before modifying to ensure other applications will not be affected.
My preference is to put this variable at the system level in the event another user account on this Windows PC requires access to Toad Data Point via the Oracle client.
Click ‘New’ in the ‘System variables’ box as shown above by red arrow.
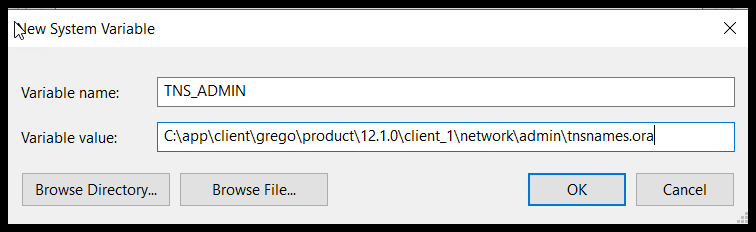
Enter the Variable Name as TNS_ADMIN.
Enter the path to the tnsnames.ora file as
C:appclientgregoproduct.1.0client_1networkadmintnsnames.ora.
Click OK.
Awesome! TNS_ADMIN variable has been created!
Click OK and exit all the way out of ‘Advanced system settings’
Now all the effort will pay off!
Launch Toad Data Point and we will now create a Toad Data Point Oracle connection!!!
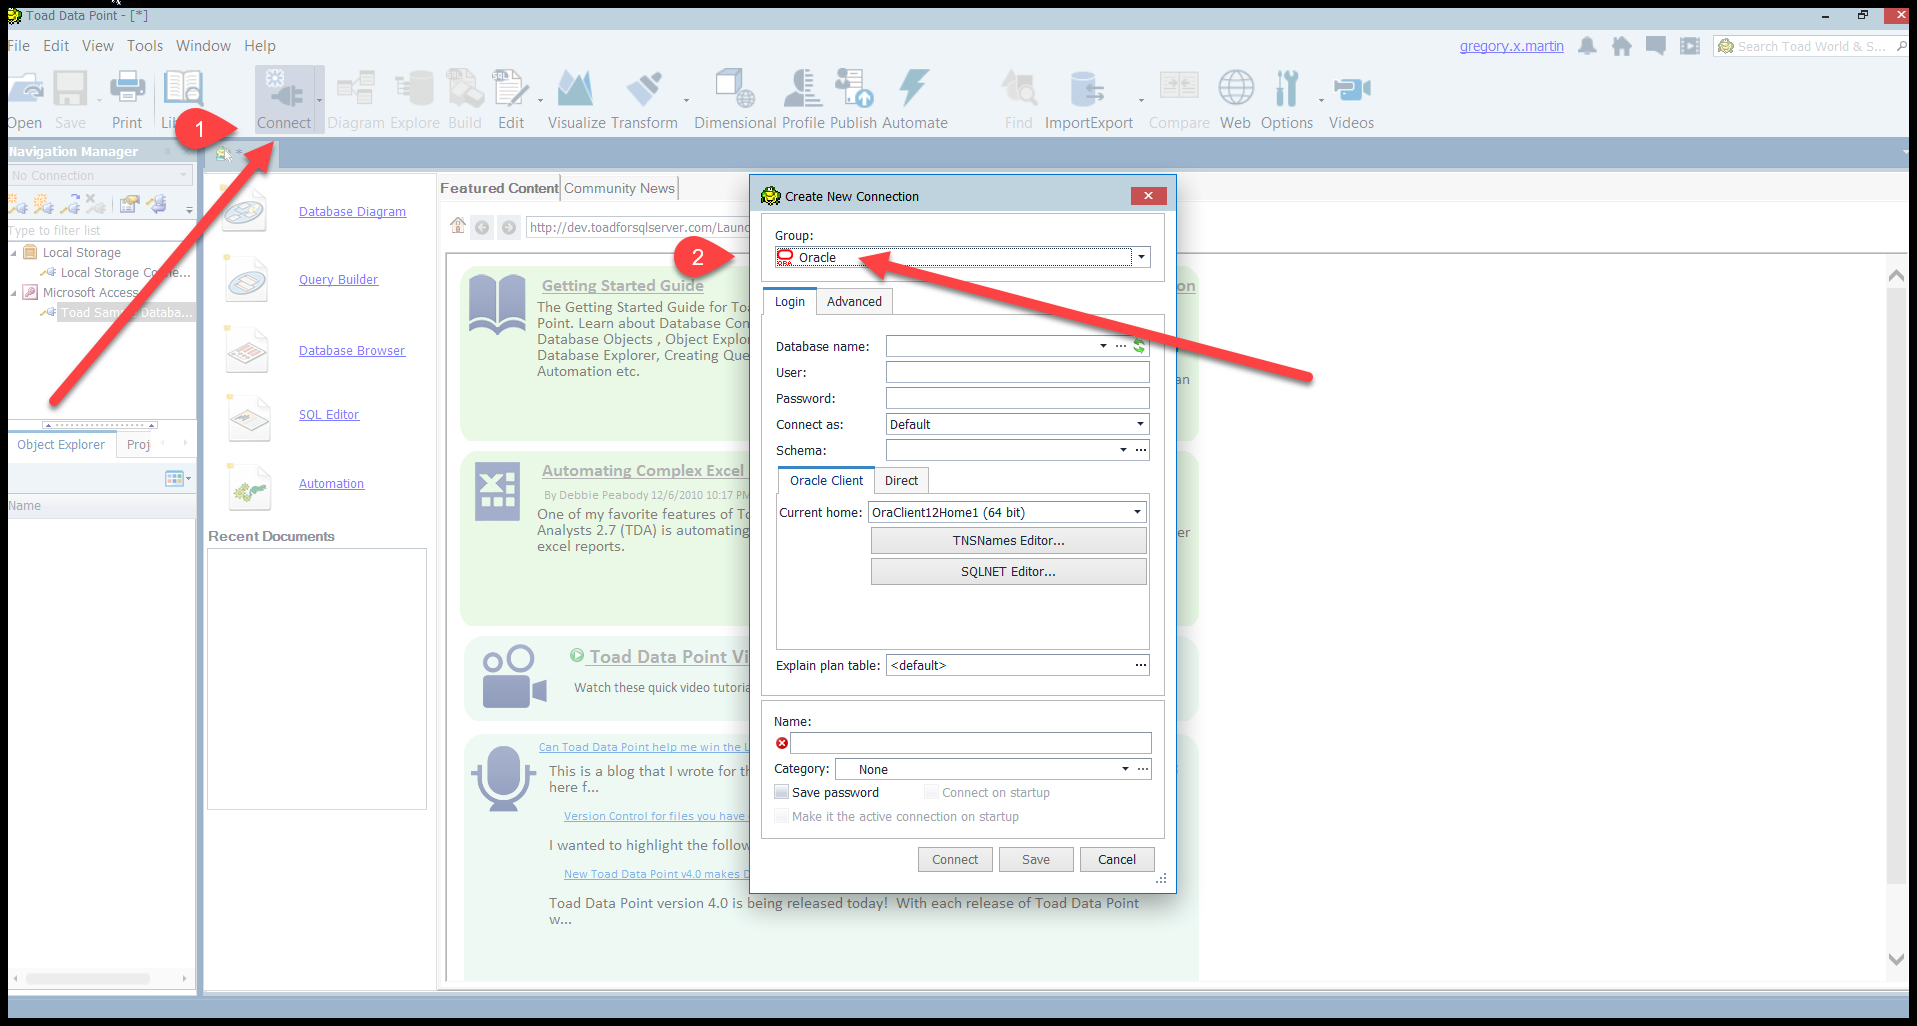
There are several ways to set up an Oracle connection. This is one of the most straight forward methods.
1-Click on the ‘Connection’ menu icon. A screen with many connection types will appear.
2-Choose ‘Oracle’ as indicated above.
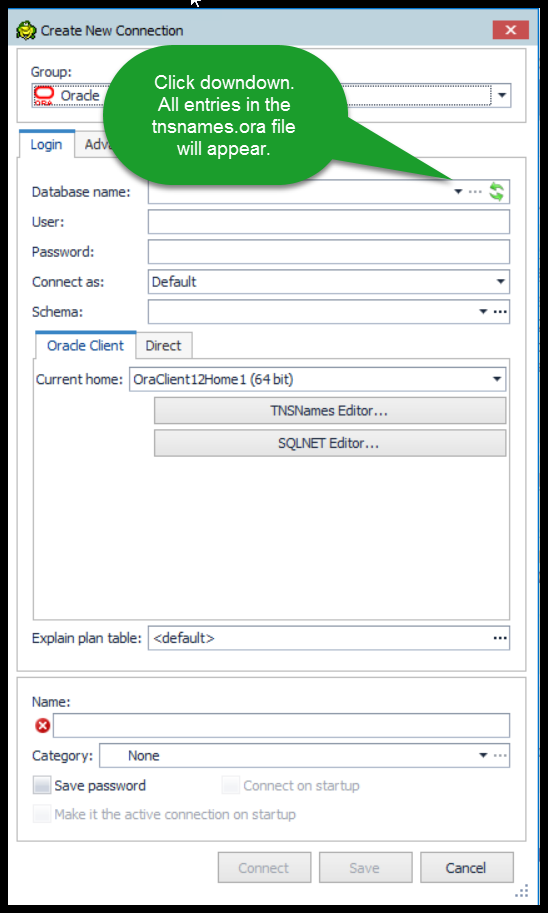
From the dropdown list choose the entry of the database you want to connect to.
Choosing PDB2 in this example.
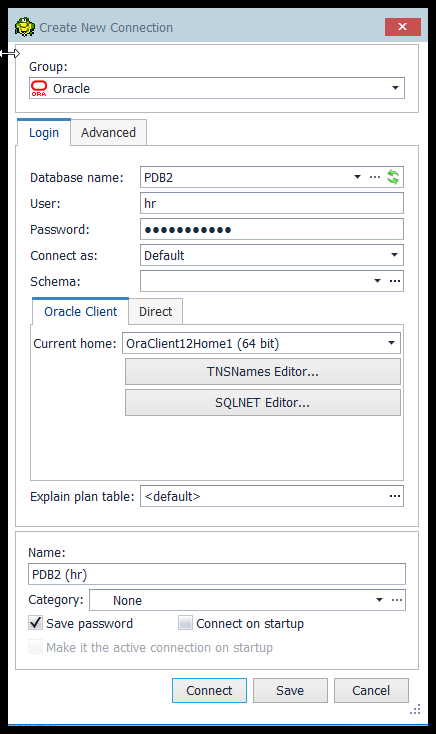
Enter User, for example hr.
Enter Password.
Click ‘Save Password’ box – my preference for simplicity but could be a security risk.
Click the Advanced tab – my preference but optional.
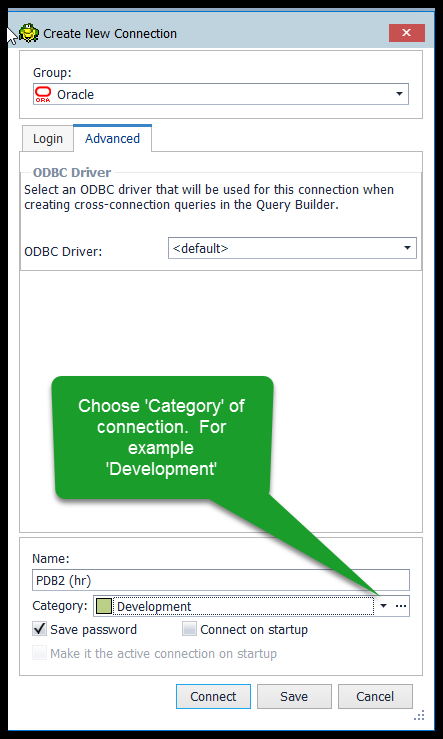
There is no requirement to specify a ‘Category’ of the connection. It is perfectly fine to ‘Click Connect’ from either the ‘Advanced’ or ‘Login’ tab.
Click on the ‘Category’ dropdown and choose appropriate environment. ‘Development’ – my preference.
Optionally – Click ‘Connect on Startup’, my preference is NOT to check this box. Unnecessary open connections consume valuable resources.
Click ‘Connect’.
You did it!!!
Congratulations on completing an Oracle 12c client install and setting up a Toad Data Point Oracle connection!
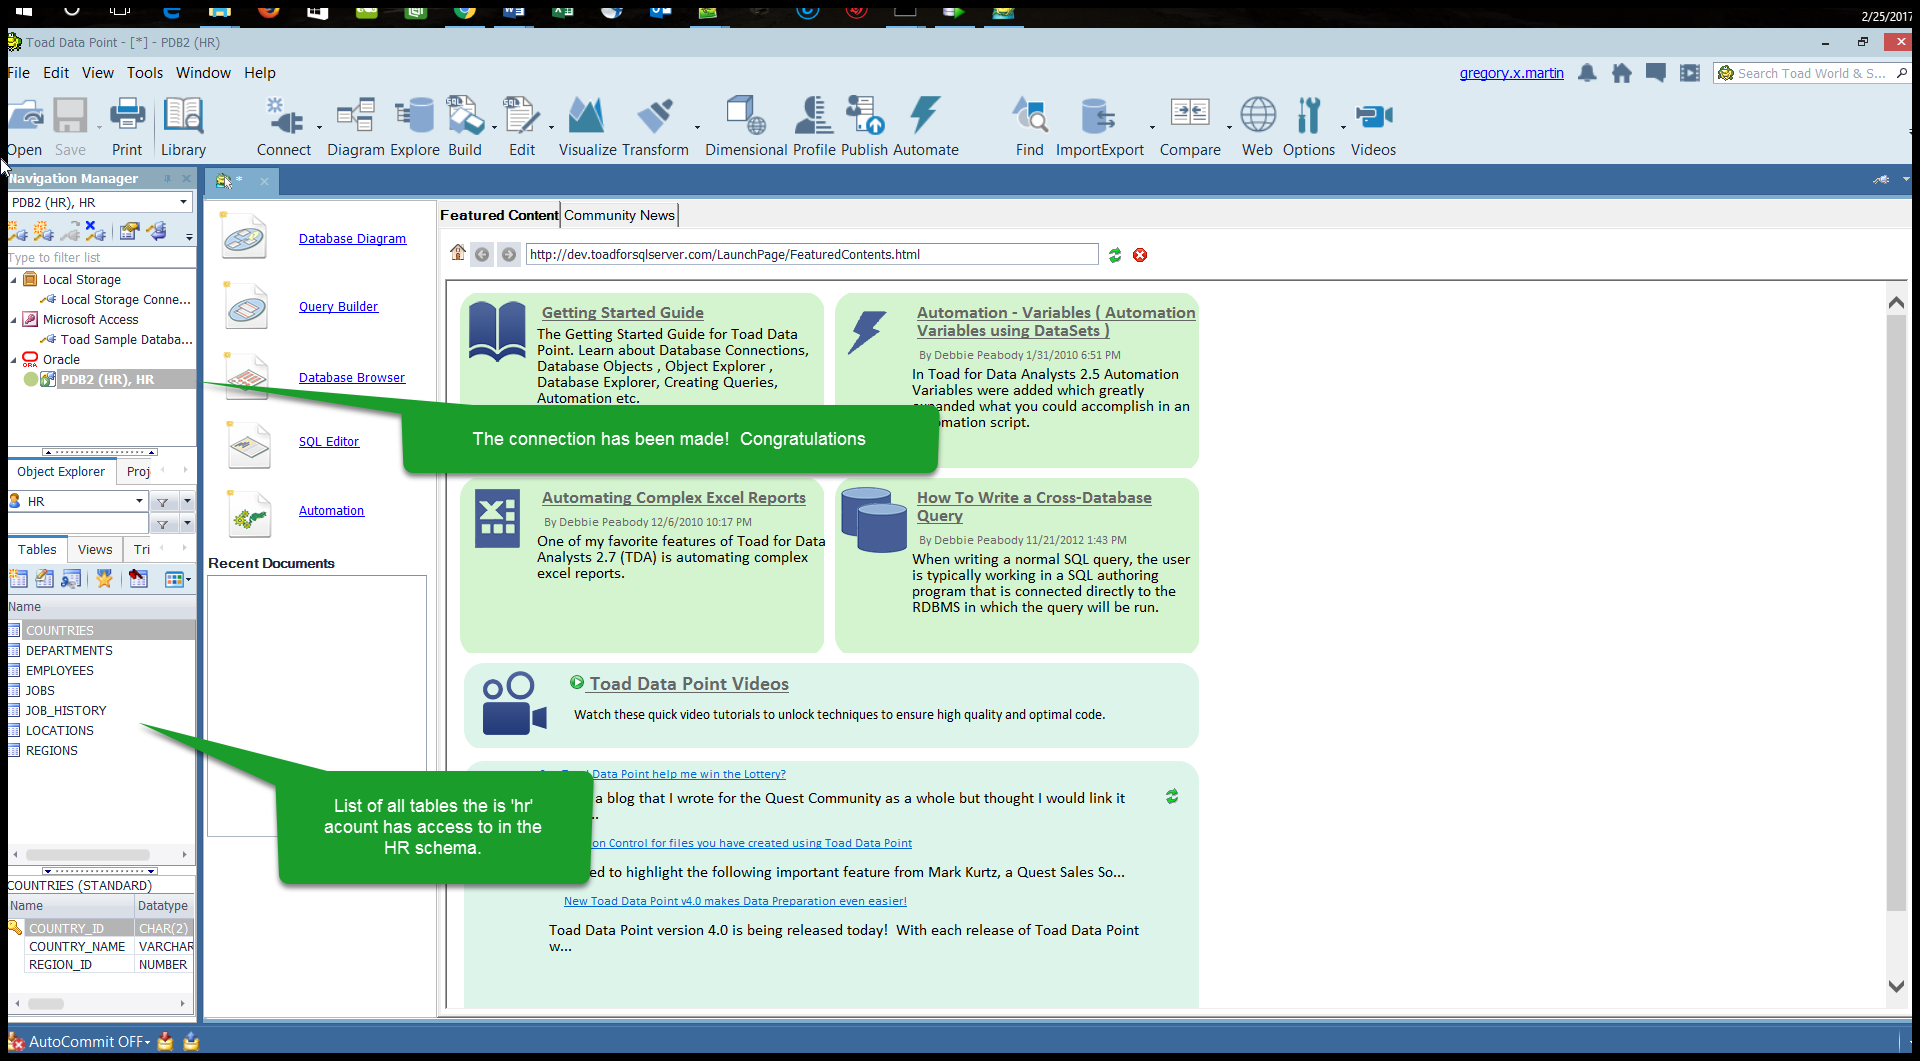
All done. Q.E.D.
Celebration time now!!!

TOAD World Maven
Gregory P. Martin
Summit Racing Equipment
Email Work: gmartin@summitracing.com
Email Home: gregory.x.martin@gmail.com
Most Fortune 500 companies choose ToadTool for Oracle Application Developers, more widely known as Toad®, was designed by Oracle developer, Jim McDaniel, to make his job easier. It was so helpful that Jim decided to share it. Fast forward to more than 20 years later, Toad is a trusted tool used in most Fortune 500 companies and across the globe. There are many reasons why people buy Toad rather than staying with the “free” SQL Developer tool Oracle offers. One main reason developers and DBAs choose Toad for Oracle is to reduce time and effort to develop and manage Oracle databases. But did you know that with Toad for Oracle you can automate administration tasks and proactively manage your databases while embracing performance optimization and risk mitigation? Did you know Toad can now find and control sensitive data across all your Oracle databases? What else can Toad do that you didn’t know about? Which edition will benefit you the most? We’re so confident that you will love Toad, we’re offering our top 2 editions to you to try for free for 30 days.
|

Start the discussion at forums.toadworld.com