Upon occasion you may find a need to import data into a database. That database might be your own sandbox or you can use the Toad Sample database or Local Storage. I am going to show you three different Import Methods.
Scenario 1
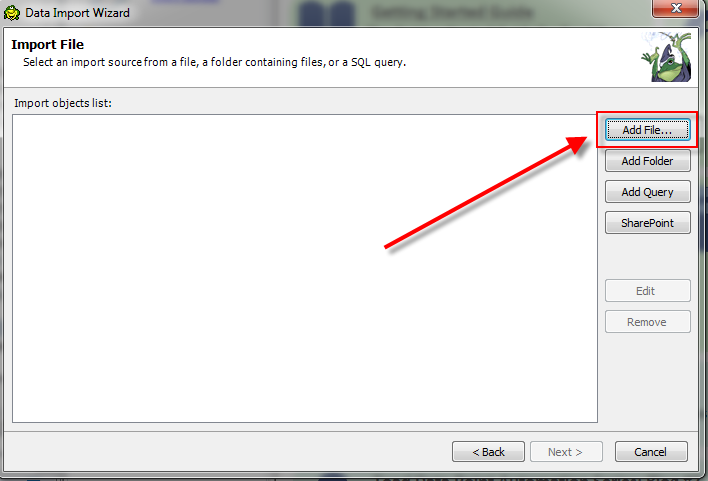
The most common use case is taking an Excel or CSV file and import. Toad Data Point will import to the current connection. So connect to the sandbox that you want. I will use the Local Storage database, available in the Pro edition. Then choose Tools | Import Wizard. Click on the Import File button and select your input file.
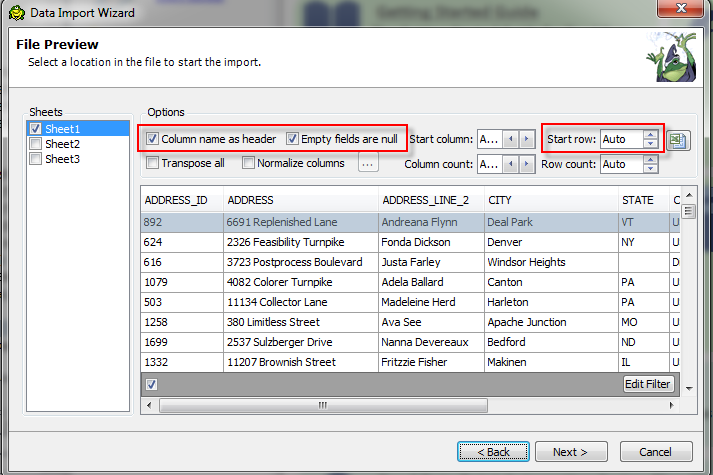
The next screen shows you a preview of the data. Choose the start row if the data does not start at the first row and column. You can also choose whether you want to retain column headers and to insert empty values as null. Next add or delete any columns you want.
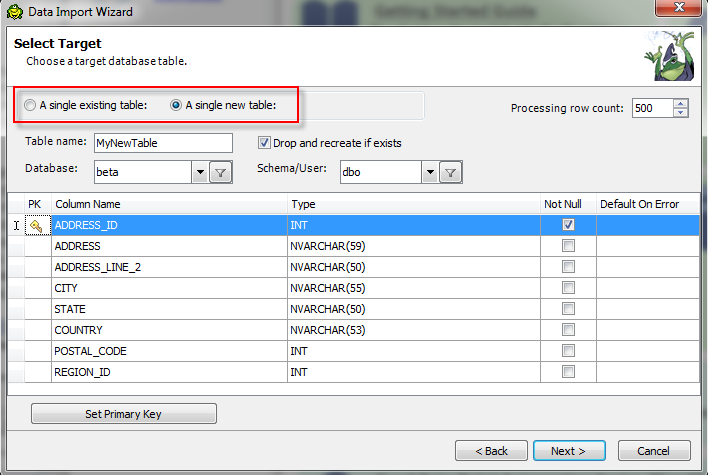
You can import your data into a new table by choosing “A single new Table” and providing a name. Of if you choose an existing table you can append the data or truncate the table before inserting.
Make sure and save the Import definition as a template so you can use in an automation script.
Scenario 2
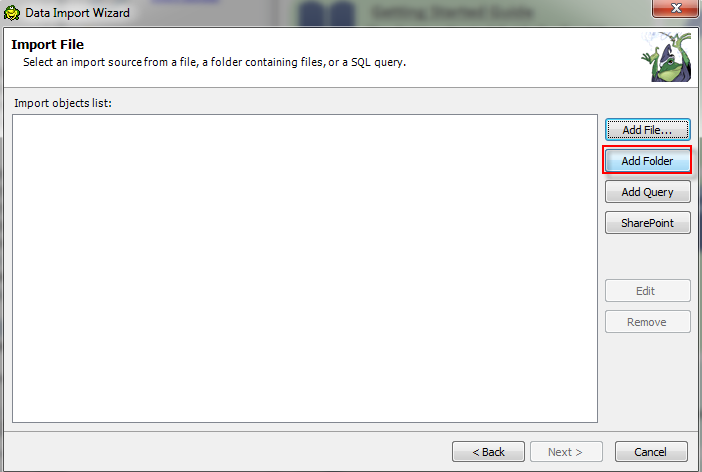
But what if you want to process more than one file the same way? It would be inconvenient to make multiple templates. So in this case, we want to use the Add Folder import type. I get sets of files from an outside vender that have similar names.
Add a filter that will capture the correct files by using a wild card string, extension type, or by modified date.
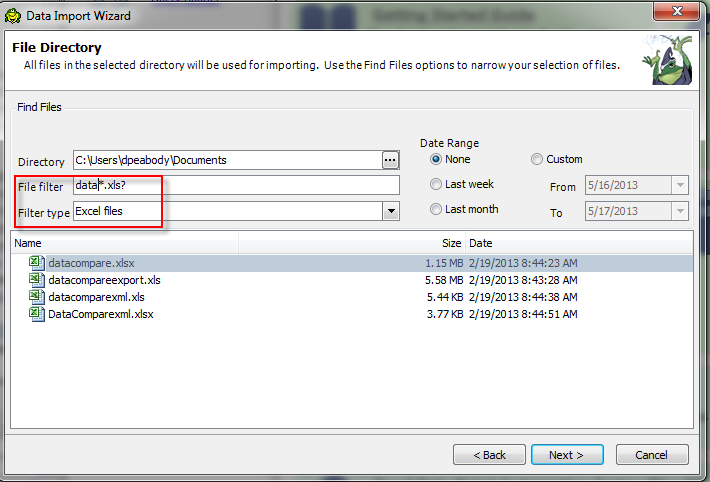
The preview window will show you the first file that was found. Like the other preview, you can set the range of data.
Now we can import into new table or existing table and save the Import definition as a template.
Scenario 3
The third import type is my favorite. I deal with a lot of different databases and I often need a copy of one table and its data put on another database. Or I want to execute a query and import the result to my sand box. In this case I use the Add Query Import type.
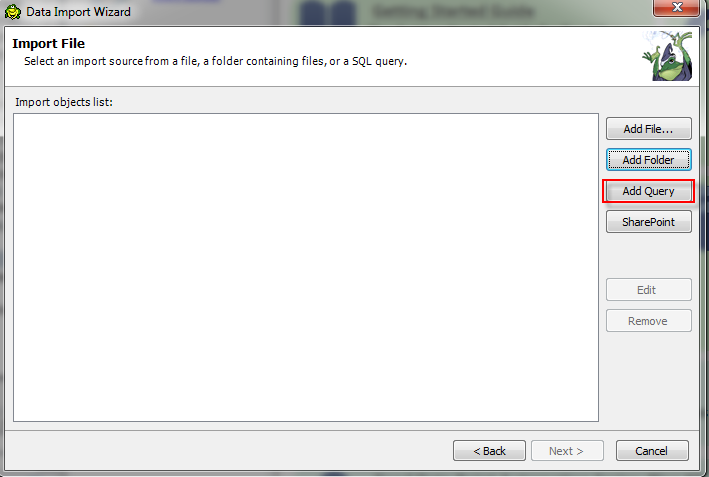
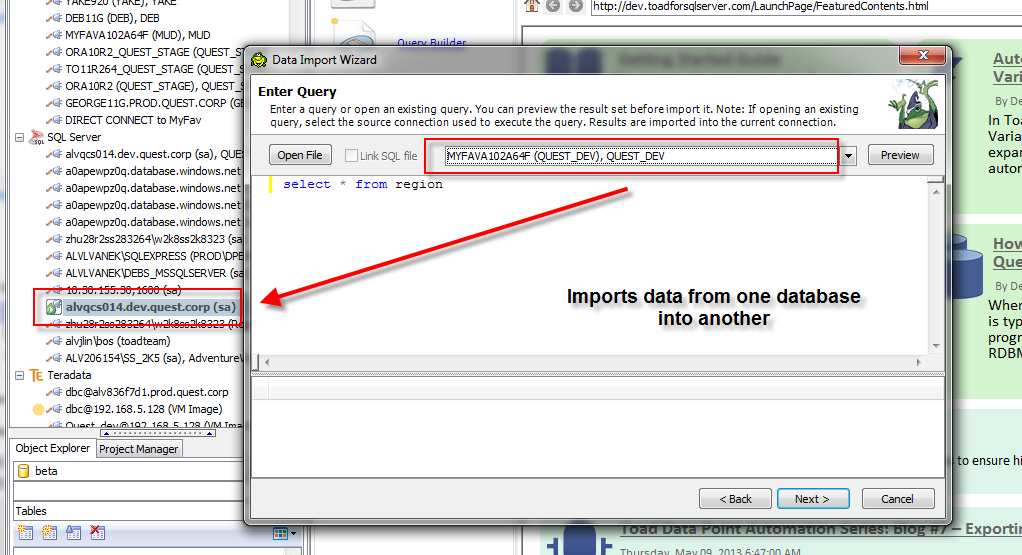
For this import type I need to select the connection of the source database. I enter a query that will be used to create the result set. The preview button will confirm that the query and connection are correct.
Then simply choose a new table or existing table to import into. Save the import definition in a template.
Automating the Imports
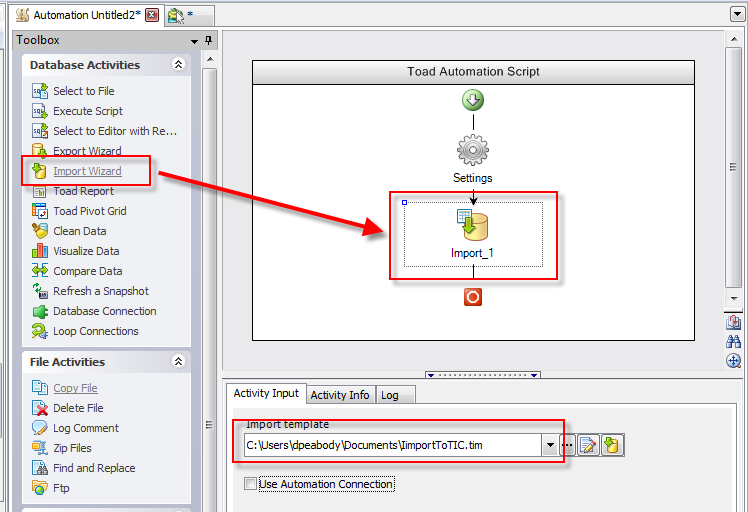
Now I am ready to automate my imports. Open up the automation designer. From the tool box single click or drag the Import Wizard activity. If you drag make sure to drag to the target. Browse to select the Import Template.
Save and run.
Importing data using automation and scheduling this during non-production hours can save lots of time. And frankly, lightening my own workload is fun. [:)]
Start the discussion at forums.toadworld.com