Exporting data is a key activity for automation and the Select to File activity handles most basic exporting needs. But what if you have a little bit special situation that needs to be exported? In this case you can use all features of the Export Wizard.
Let’s look at some scenarios of when using the Export Wizard automation activity would be appropriate.
Scenario 1 – CSV files
When you have a lot of rows to export you should use the comma-separated variable format. It is the most compact and will accommodate millions of rows where Excel will not. For most exports to CSV you can use the Select to File activity. But if you have commas or quotation marks embedded in the cell values you will need to change the quote characteristics. Let’ see how to do this.
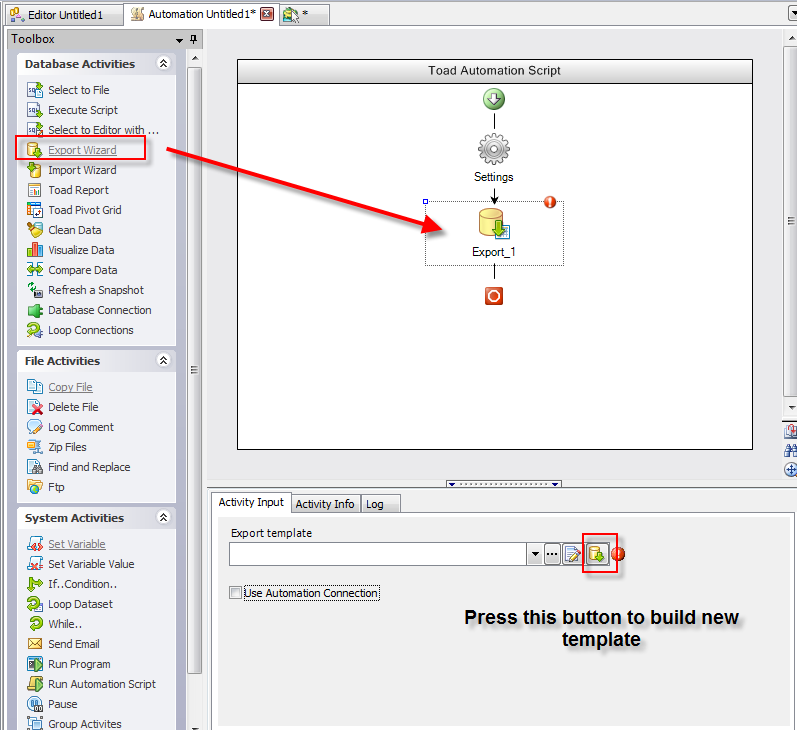
The Export Wizard automation activity takes a saved template as it’s only input. You can create a new Export Wizard from automation by clicking the build template button. Or, if you already have a template and would like to edit it you can use the edit template button.
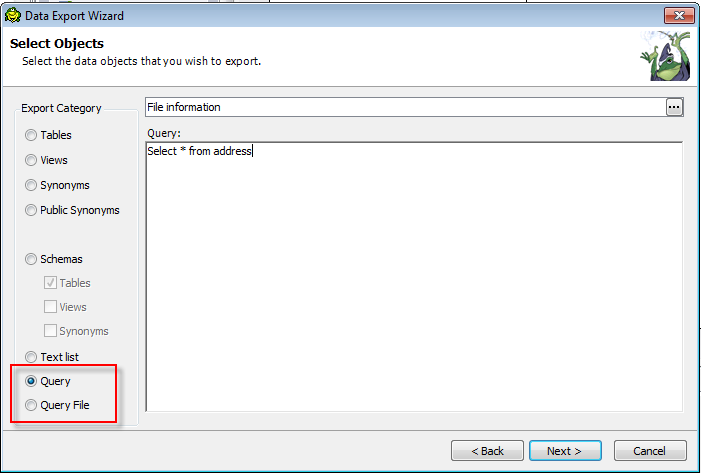
First select your input type. I think the most commonly used types are Query and Query file. When using Query, the SQL you enter is stored in the template. When using Query File you are linking the path to the template. So if you want to change the SQL often and don’t want to change your template use the Query file option.
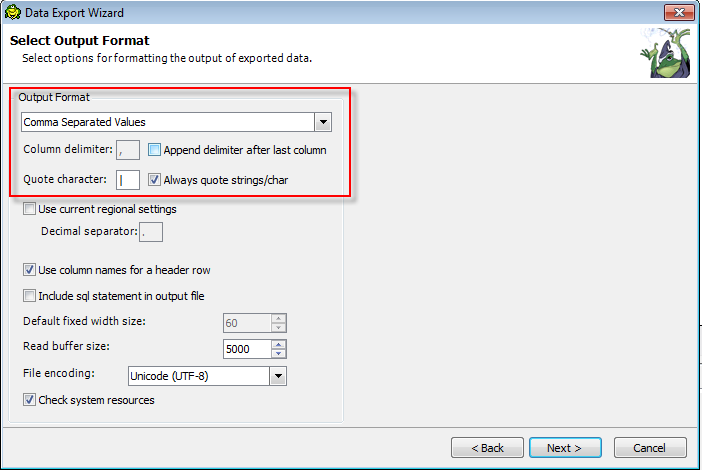
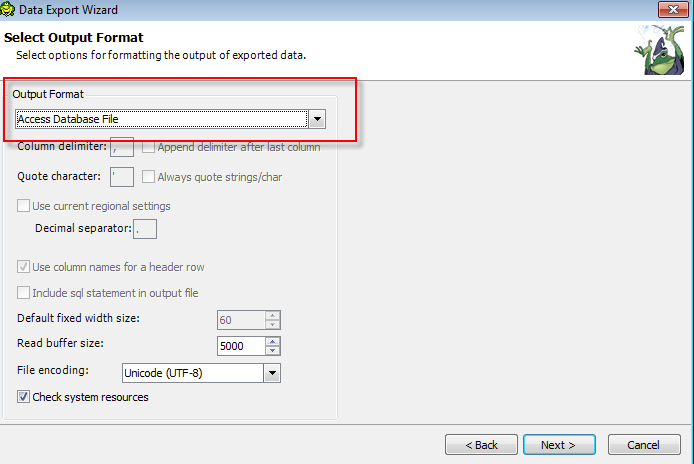
Next select your export type, which there are many. But for this demo we choose CSV. Since we want to export values that contain commas (“,”) and quotation marks (“””) you need to select “Always quote strings” and change the Quote character to a symbol that you know will not be in your string values. I like to use the vertical bar (“|”).
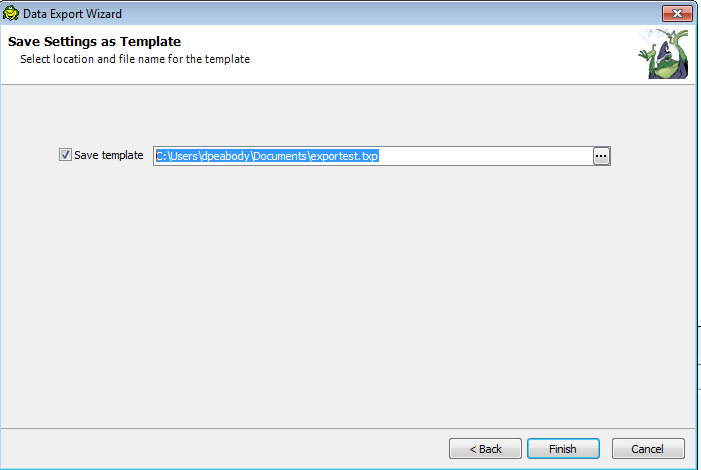
Enter your export file path, overwrite and suffix options. Then save the template to disk. Now you can run your automation script.
Scenario 2 – Using Export Template against another database
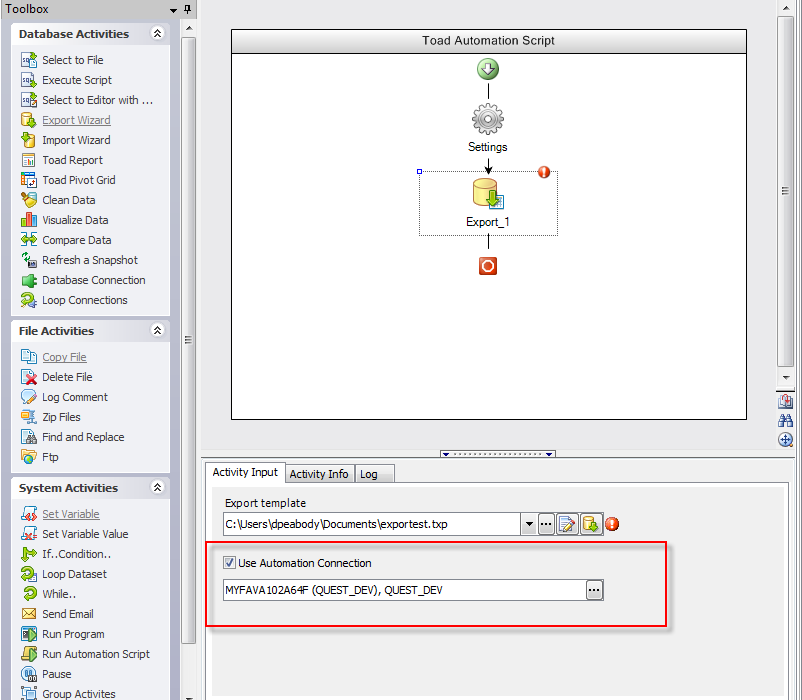
Sometimes you have the same table to export but on a different database. You do not need to redefine your export template. Here you simply select the “Use Automation Connection” option. This means to ignore the connection that was used when the template was made. Instead use the selected connection, choosing your selected connection from the drop down.
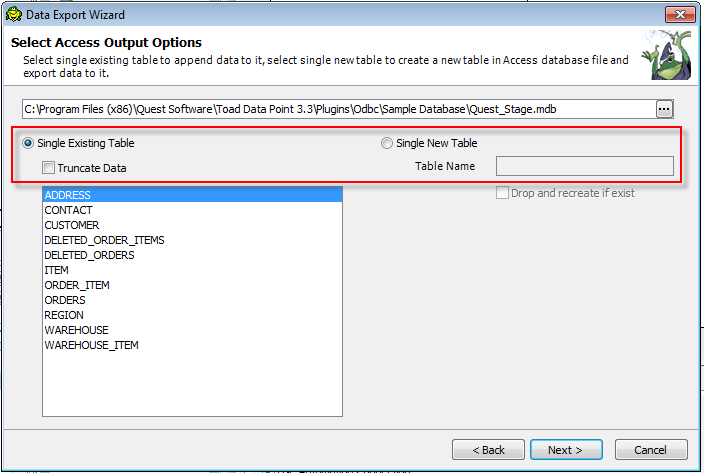
Scenario 3 – Exporting to Access
There are many other export types, but exporting to Access is also a good one to know about.
Here you can export to a new Access file or into an existing one. You can export to a new table by supplying the name or if exporting to an existing table you can choose to append the rows or truncate the table prior to exporting.
So there are a lot of different options to exporting that can be defined in the export wizard. If you find something missing, let me know and we will consider adding it. Exporting is a very important automation feature. In another video I will cover importing data.
Start the discussion at forums.toadworld.com